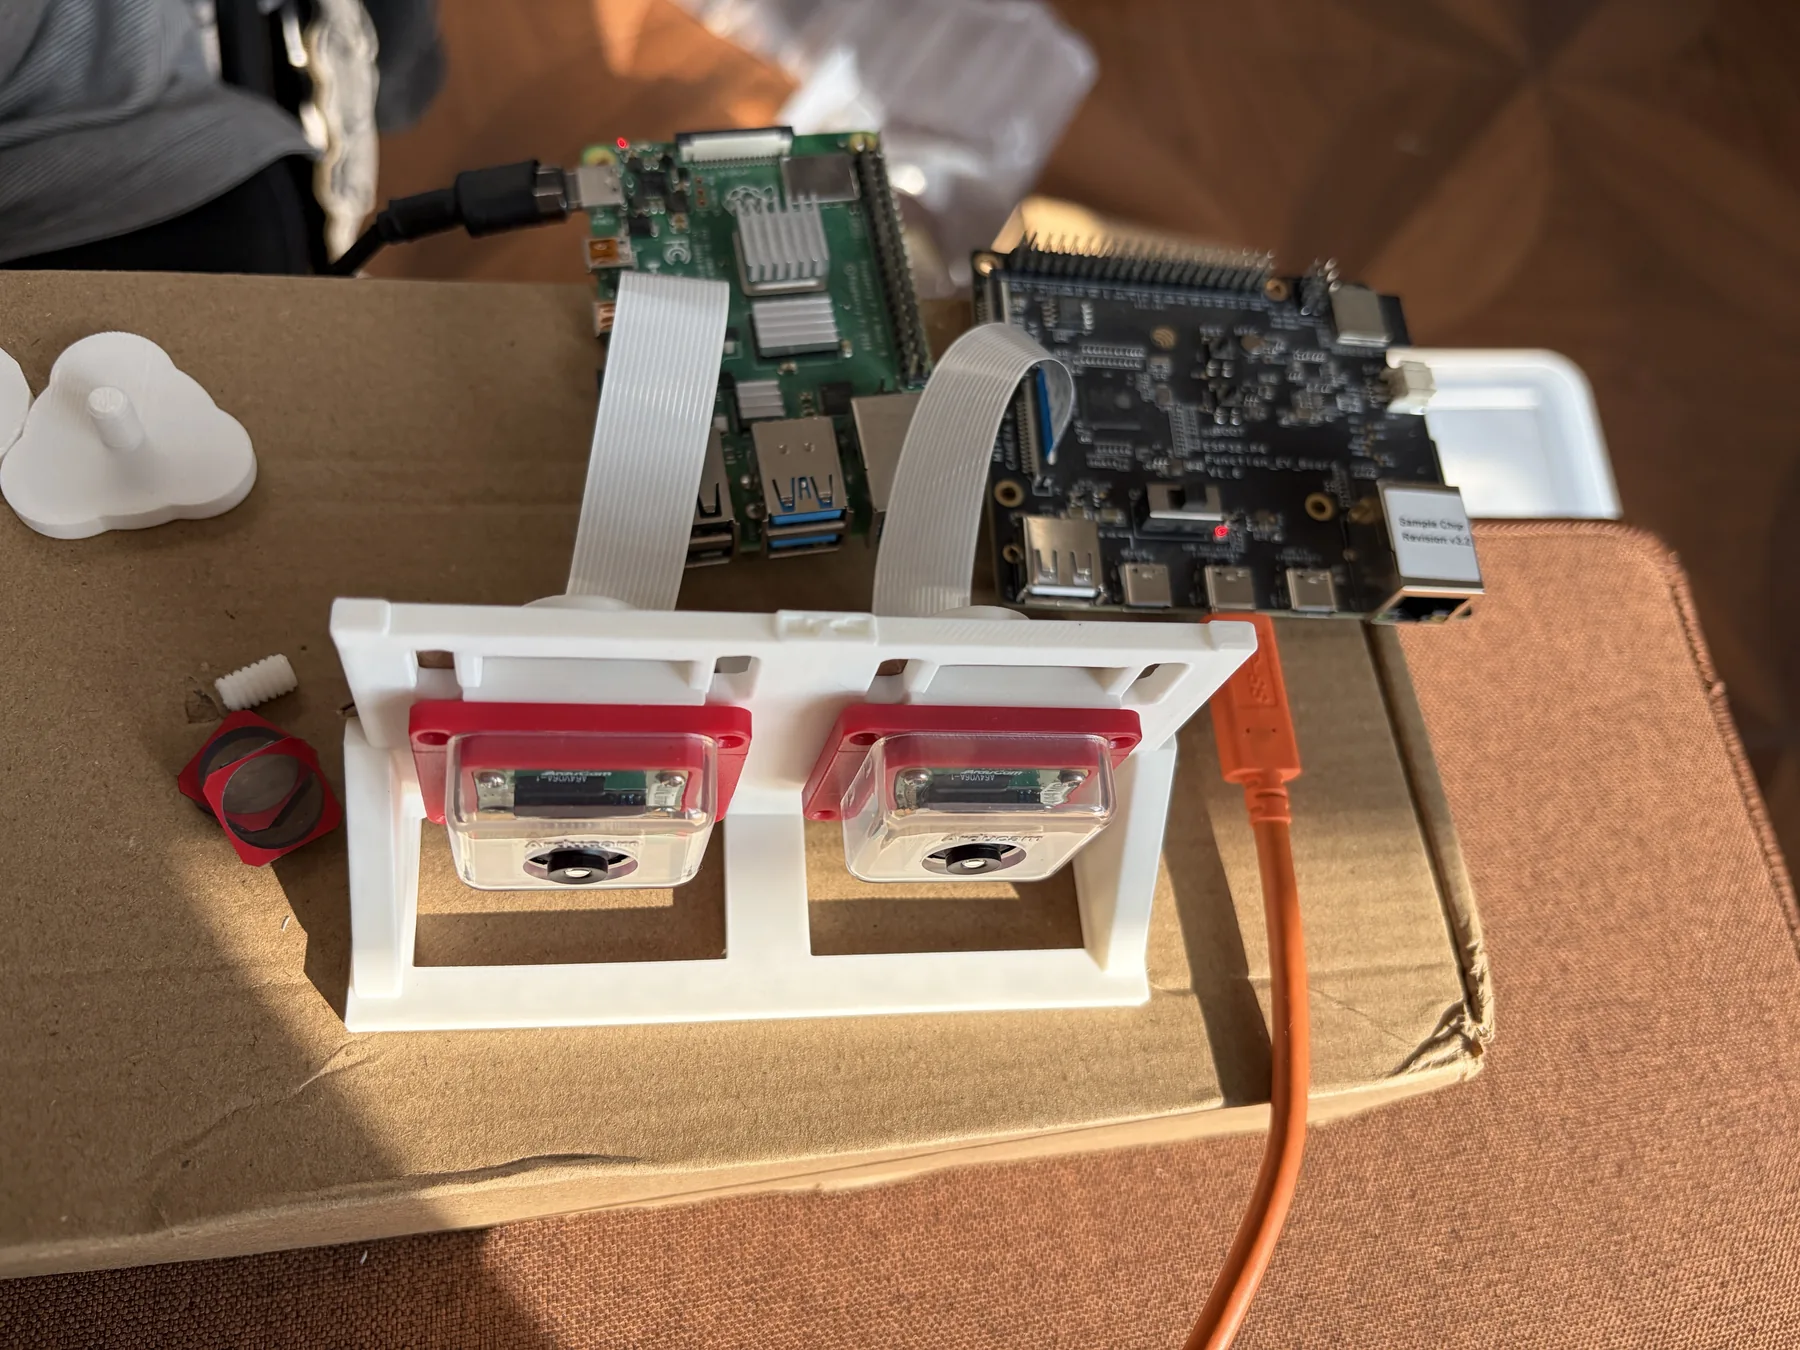
In my last post I wondered whether an old phone could replace the Raspberry Pi and camera I was assembling for a moth rig. I had a Redmi 13C 5G with a 50MP camera, an Arducam OwlSight 64MP module, a Pi 4 and an ESP32-P4. I printed a stand and made an A4 chart so I could find out what each combination actually records.
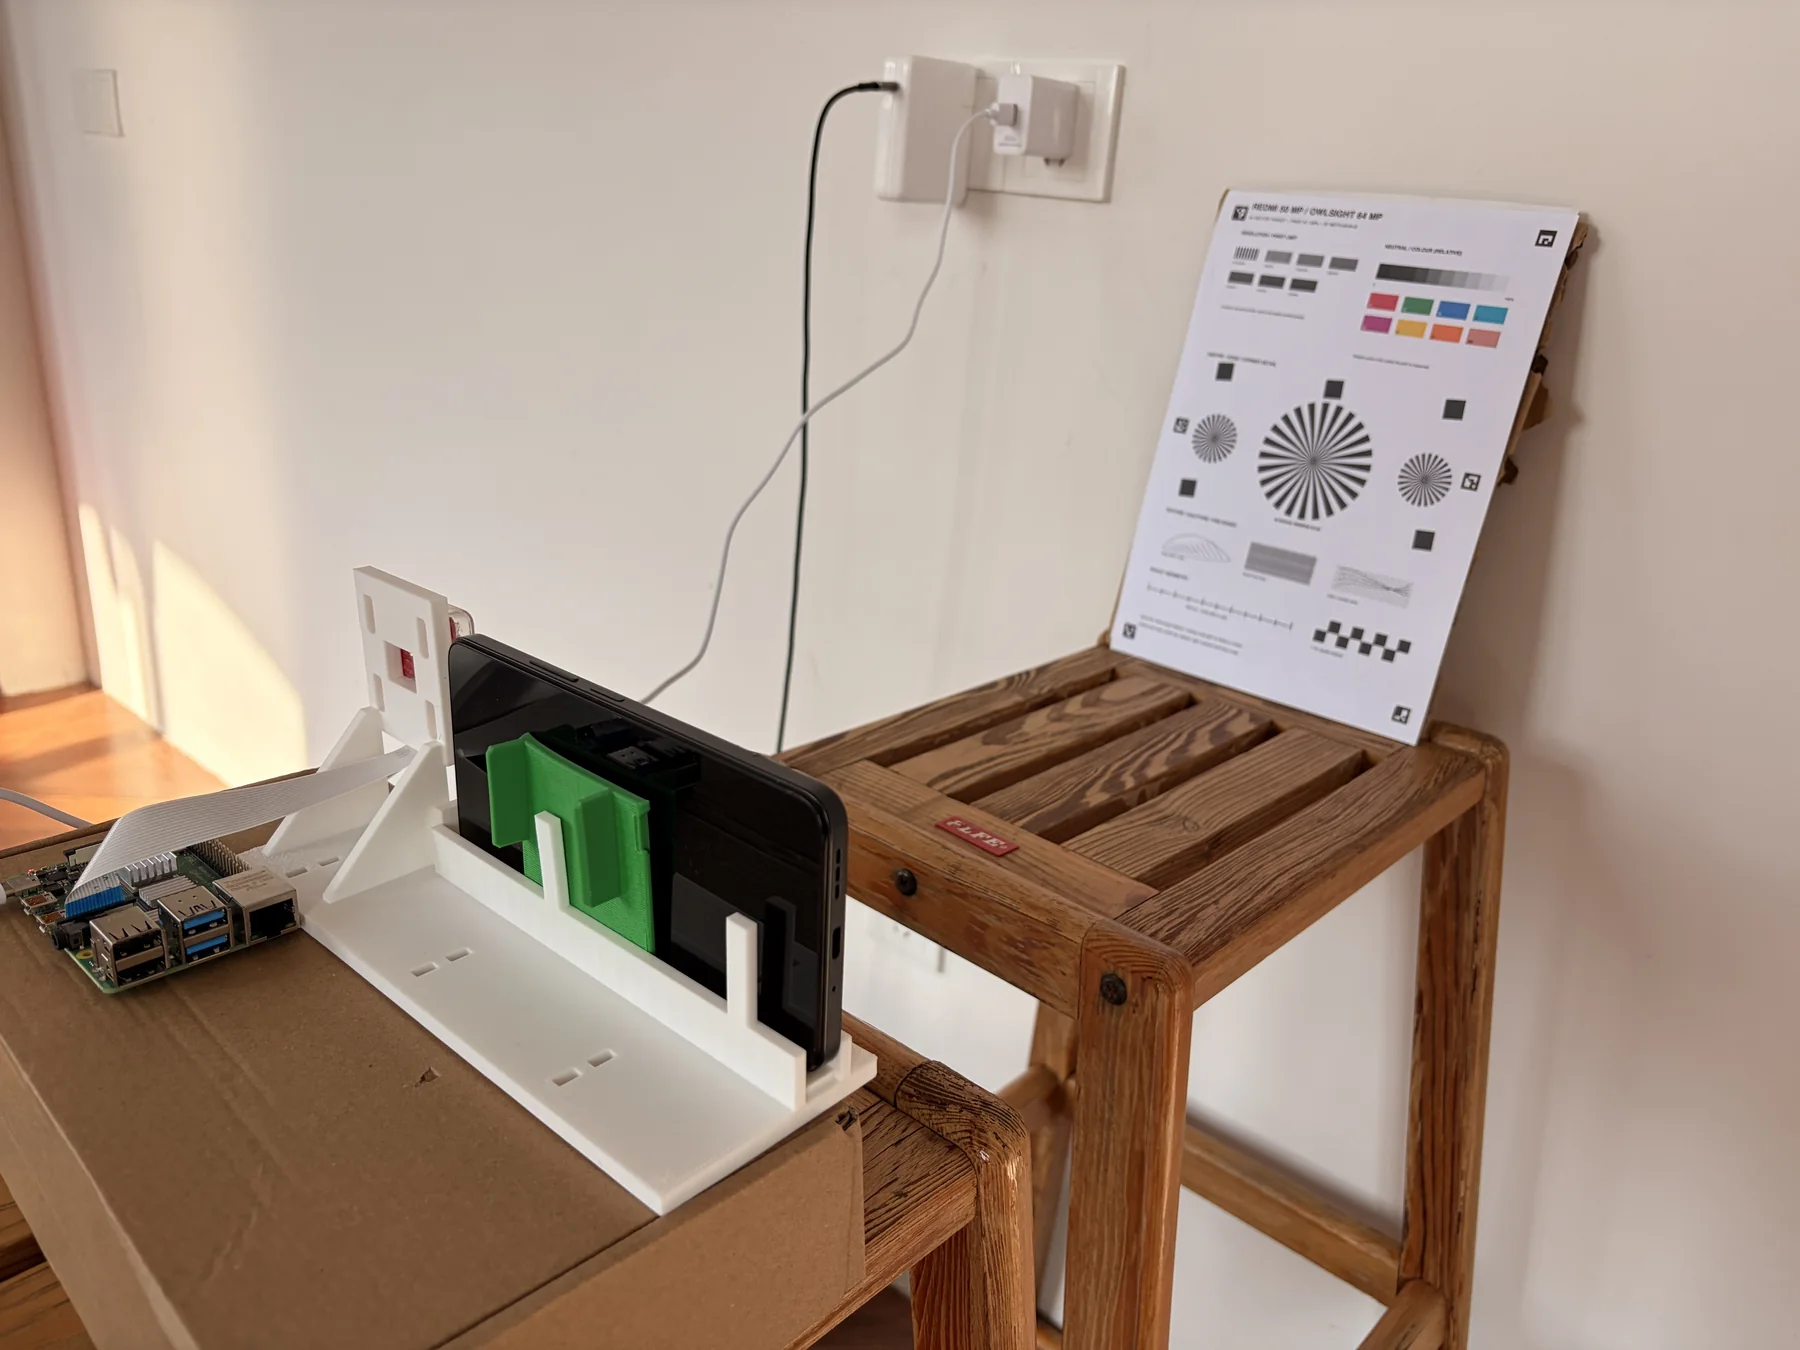
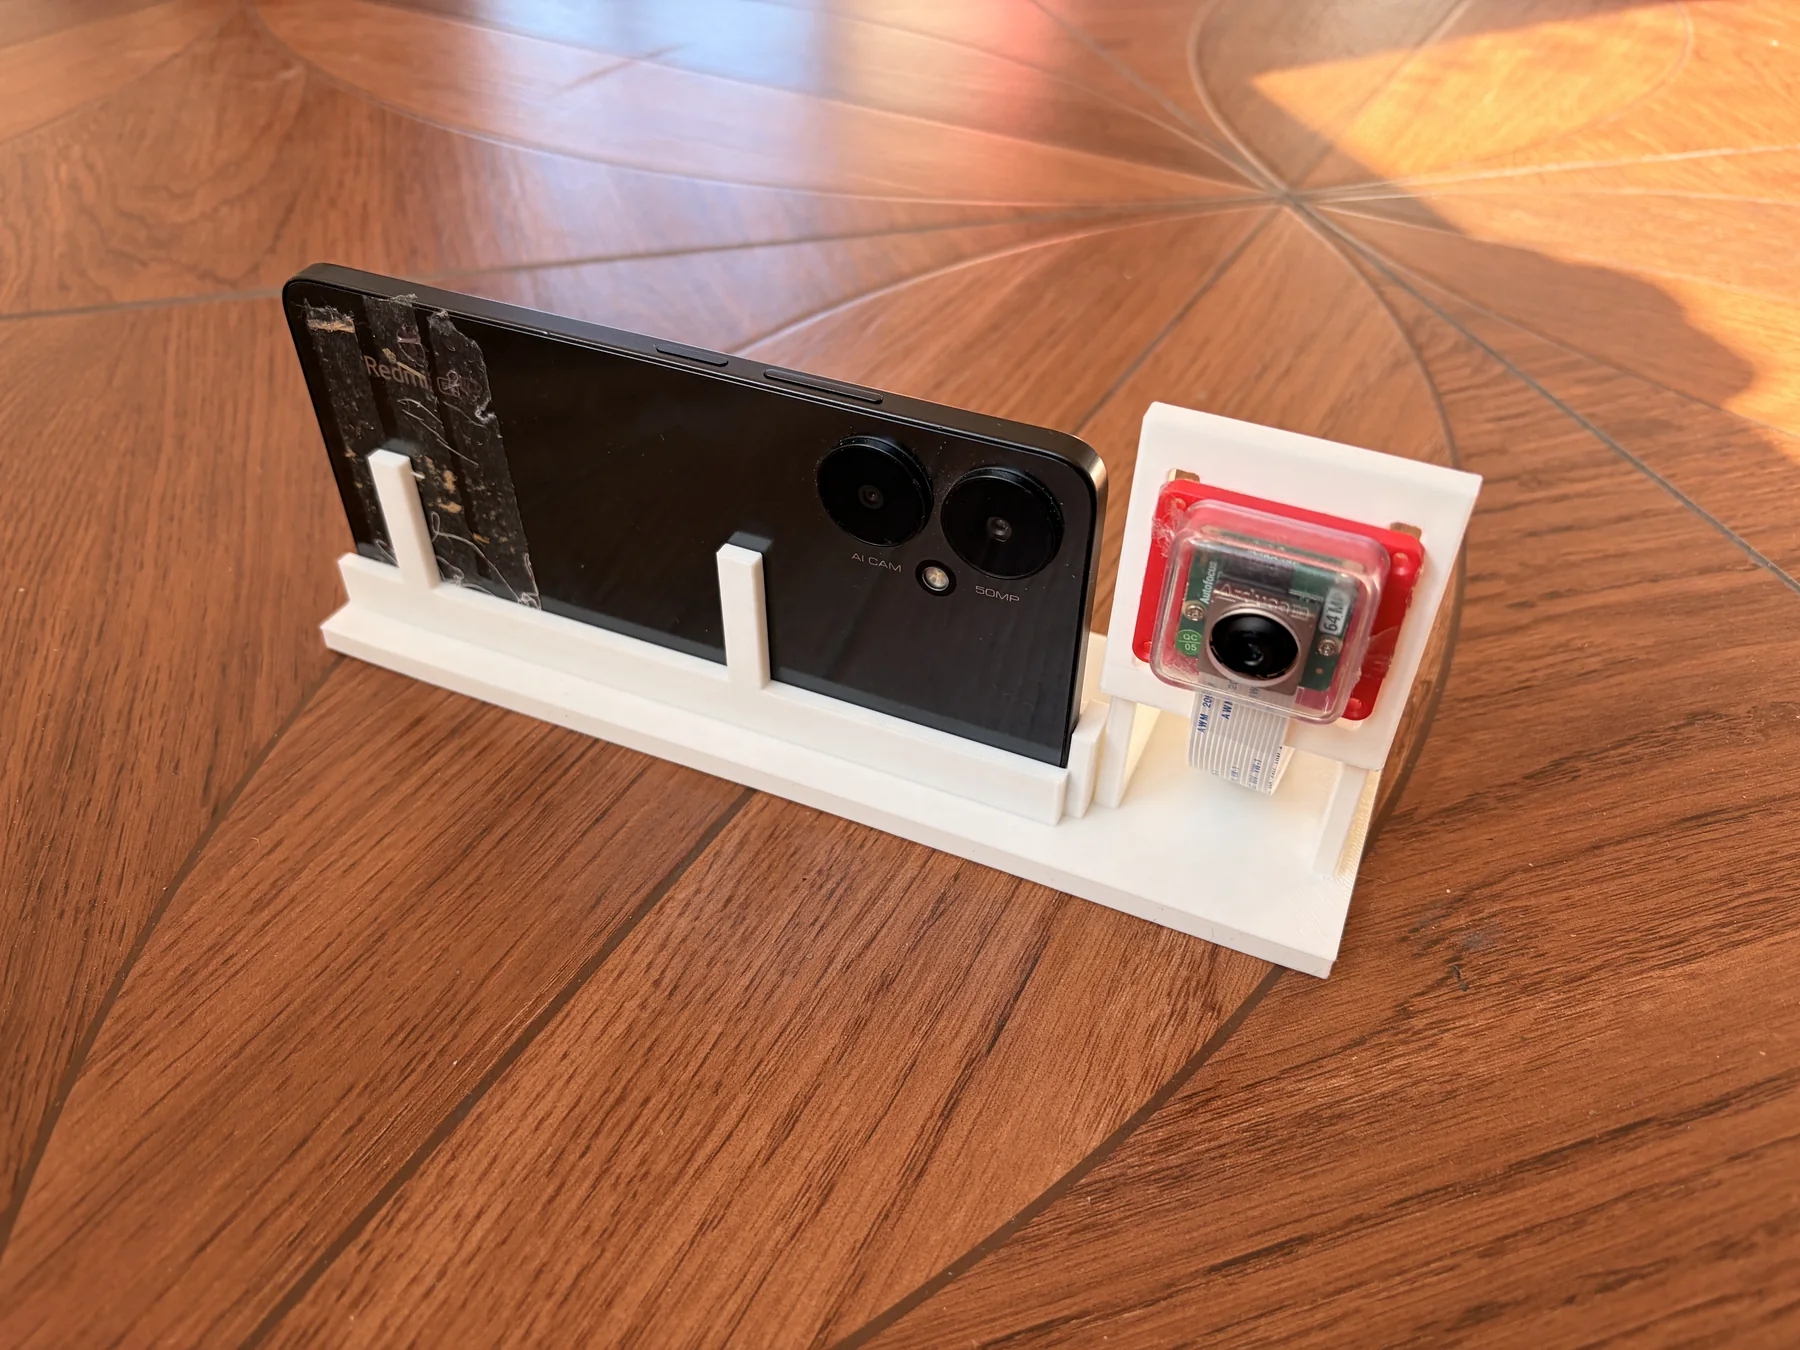
Redmi 50MP against Arducam 64MP on the Pi
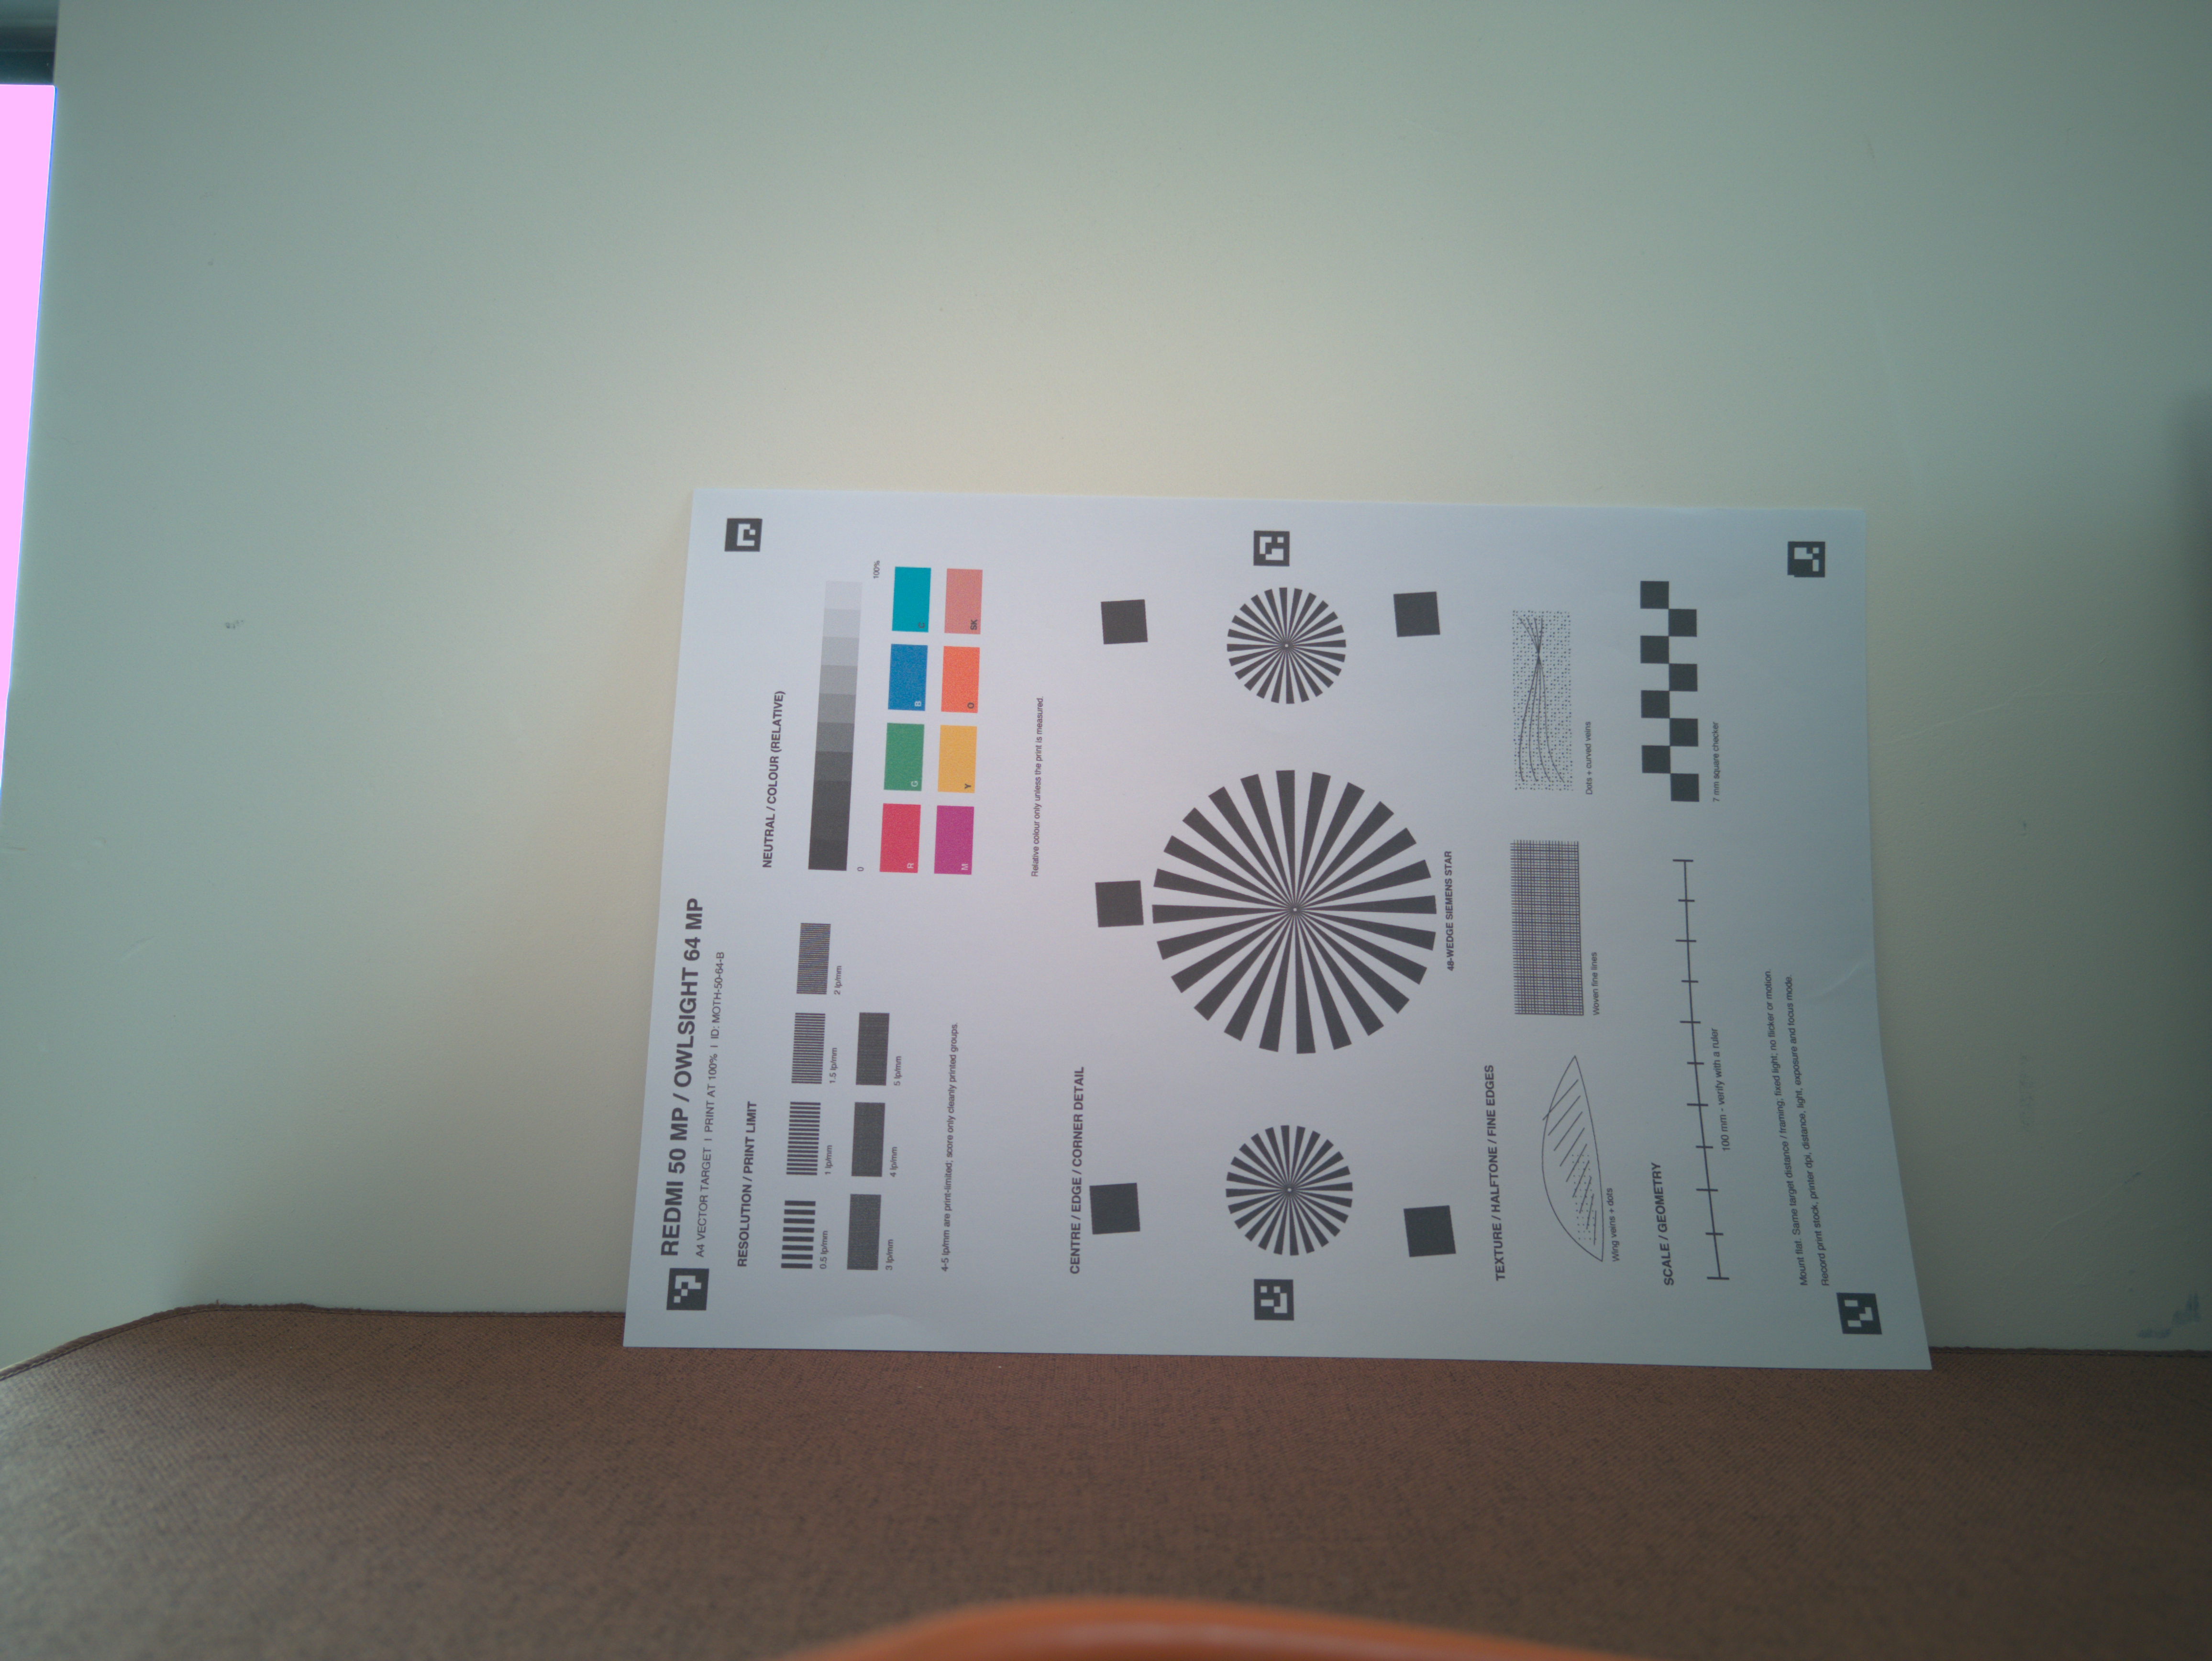
I took ten pairs with the biggest JPEG each camera could produce: Xiaomi's 50MP mode and the Pi's 64MP OwlSight mode. The Pi file has about 28% more pixels. On this chart the Redmi JPEG still looks crisper, particularly in the star and the fine lines. The median slanted-edge result across the ten pairs was 2.74 line pairs per millimetre for the Redmi and 2.40 for the Pi. That measures the whole camera and processing pipeline, not just the sensors.
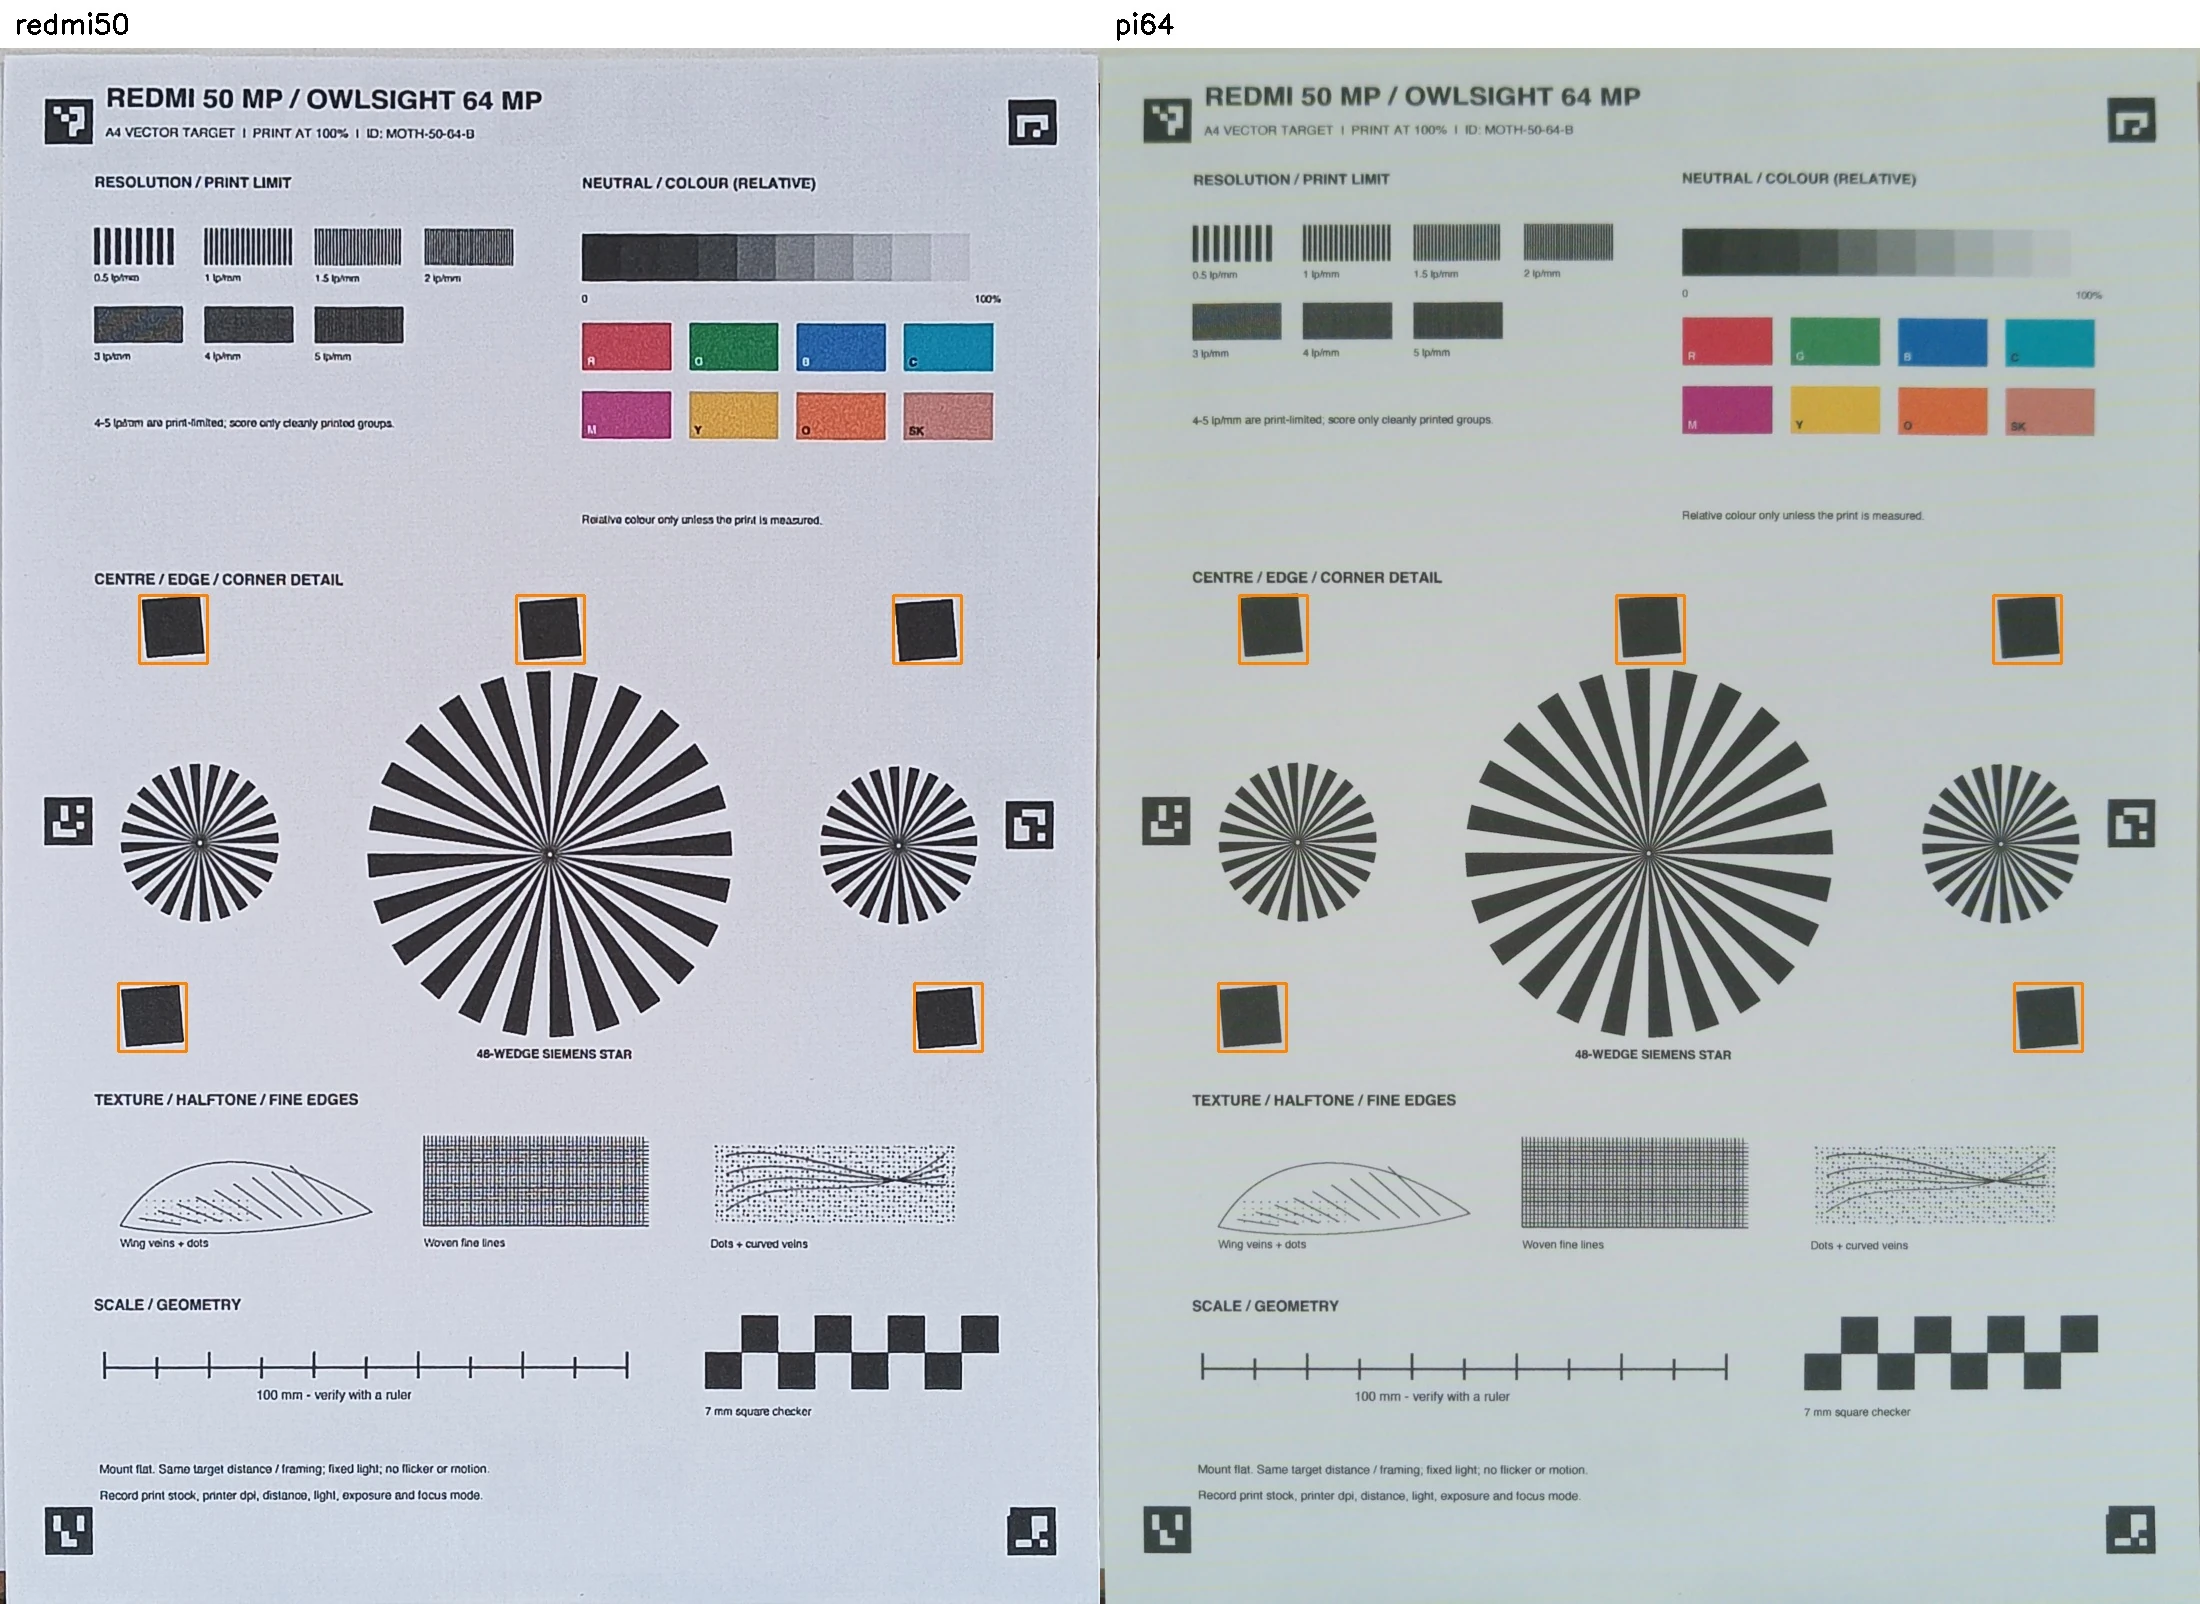
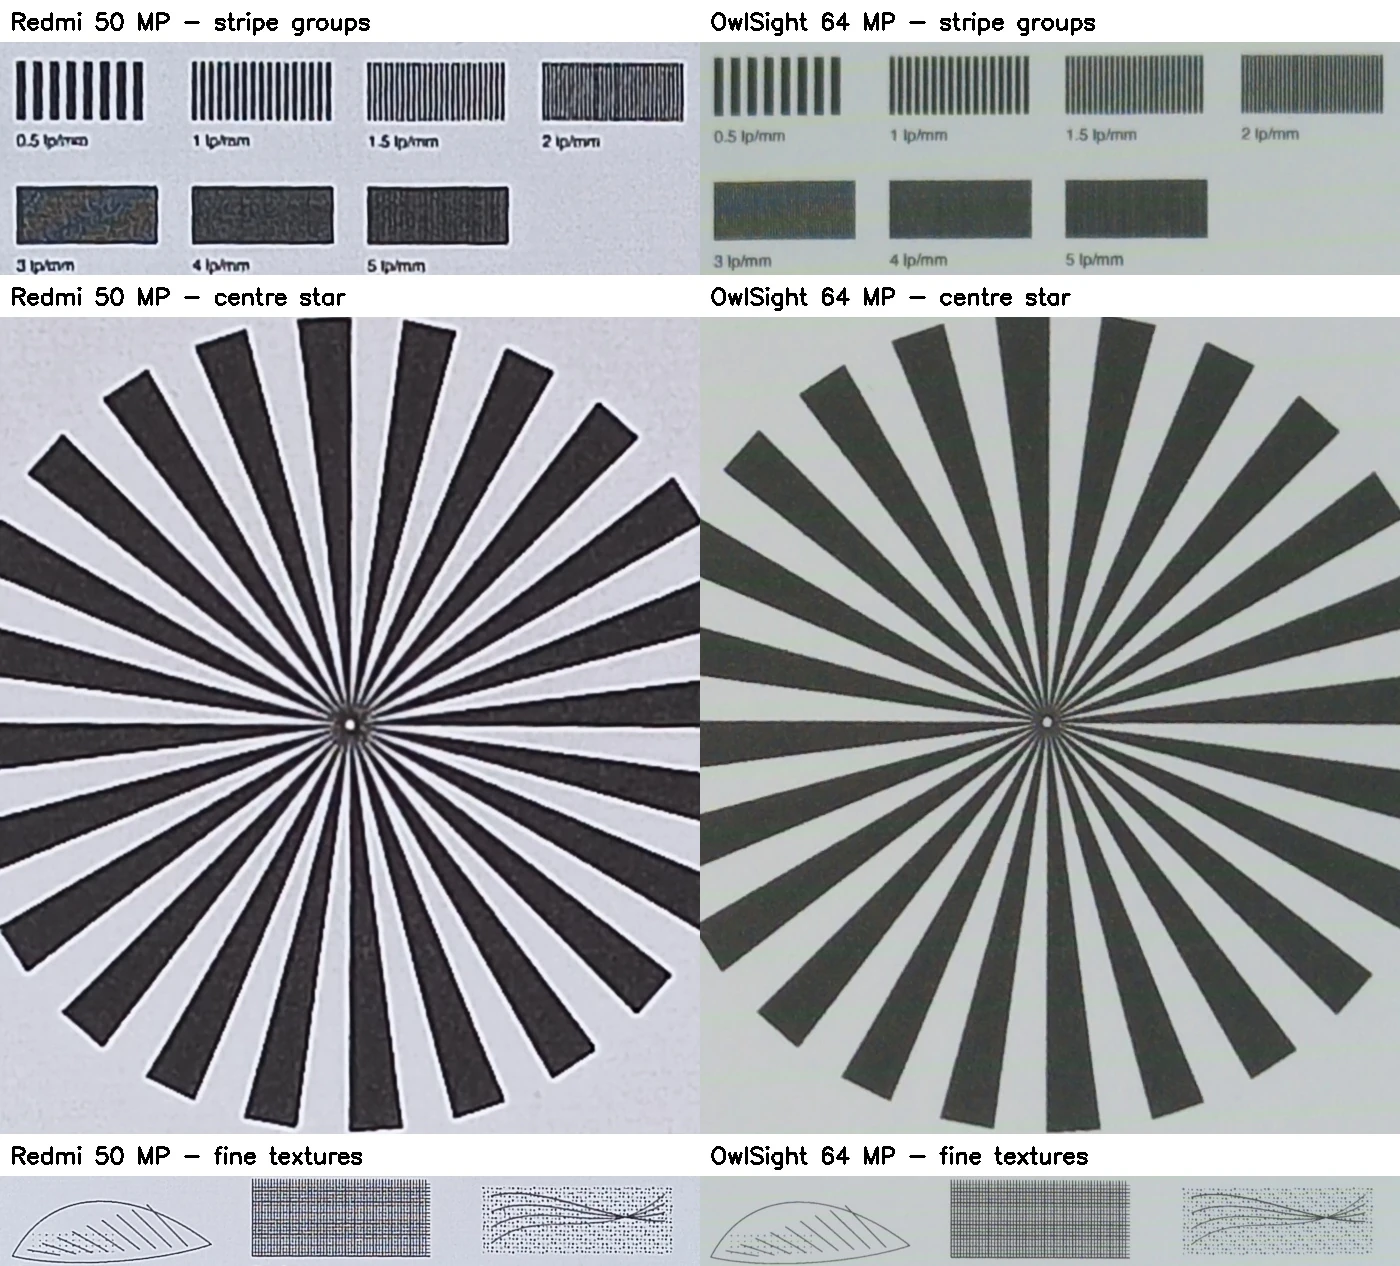
Then I compared the smaller modes I might use for regular captures. The Redmi saved a 12.5MP JPEG and RAW file. The Pi used the OwlSight's real 16.1MP binned mode, also saving JPEG and RAW. Both confirmed focus before the shot.

I developed the two RAW files with the same settings to take away much of the difference between their JPEG processing. The edge scores became 1.67 for the Redmi and 1.70 for the Pi. On this pair, I would not call either RAW image the detail winner. The Redmi's finished JPEG is doing quite a bit of work after the exposure.

Putting the Arducam on the ESP32-P4
The Pi gives the OwlSight a mature image pipeline, but I also wanted to see how far I could drive the same sensor from the cheaper P4 board. I put a second OwlSight beside the Pi's module in a printed two-camera stand and photographed the chart again in daylight. This was a separate session from the Redmi test, so the two sets of scores should not be treated as a single three-camera shootout.
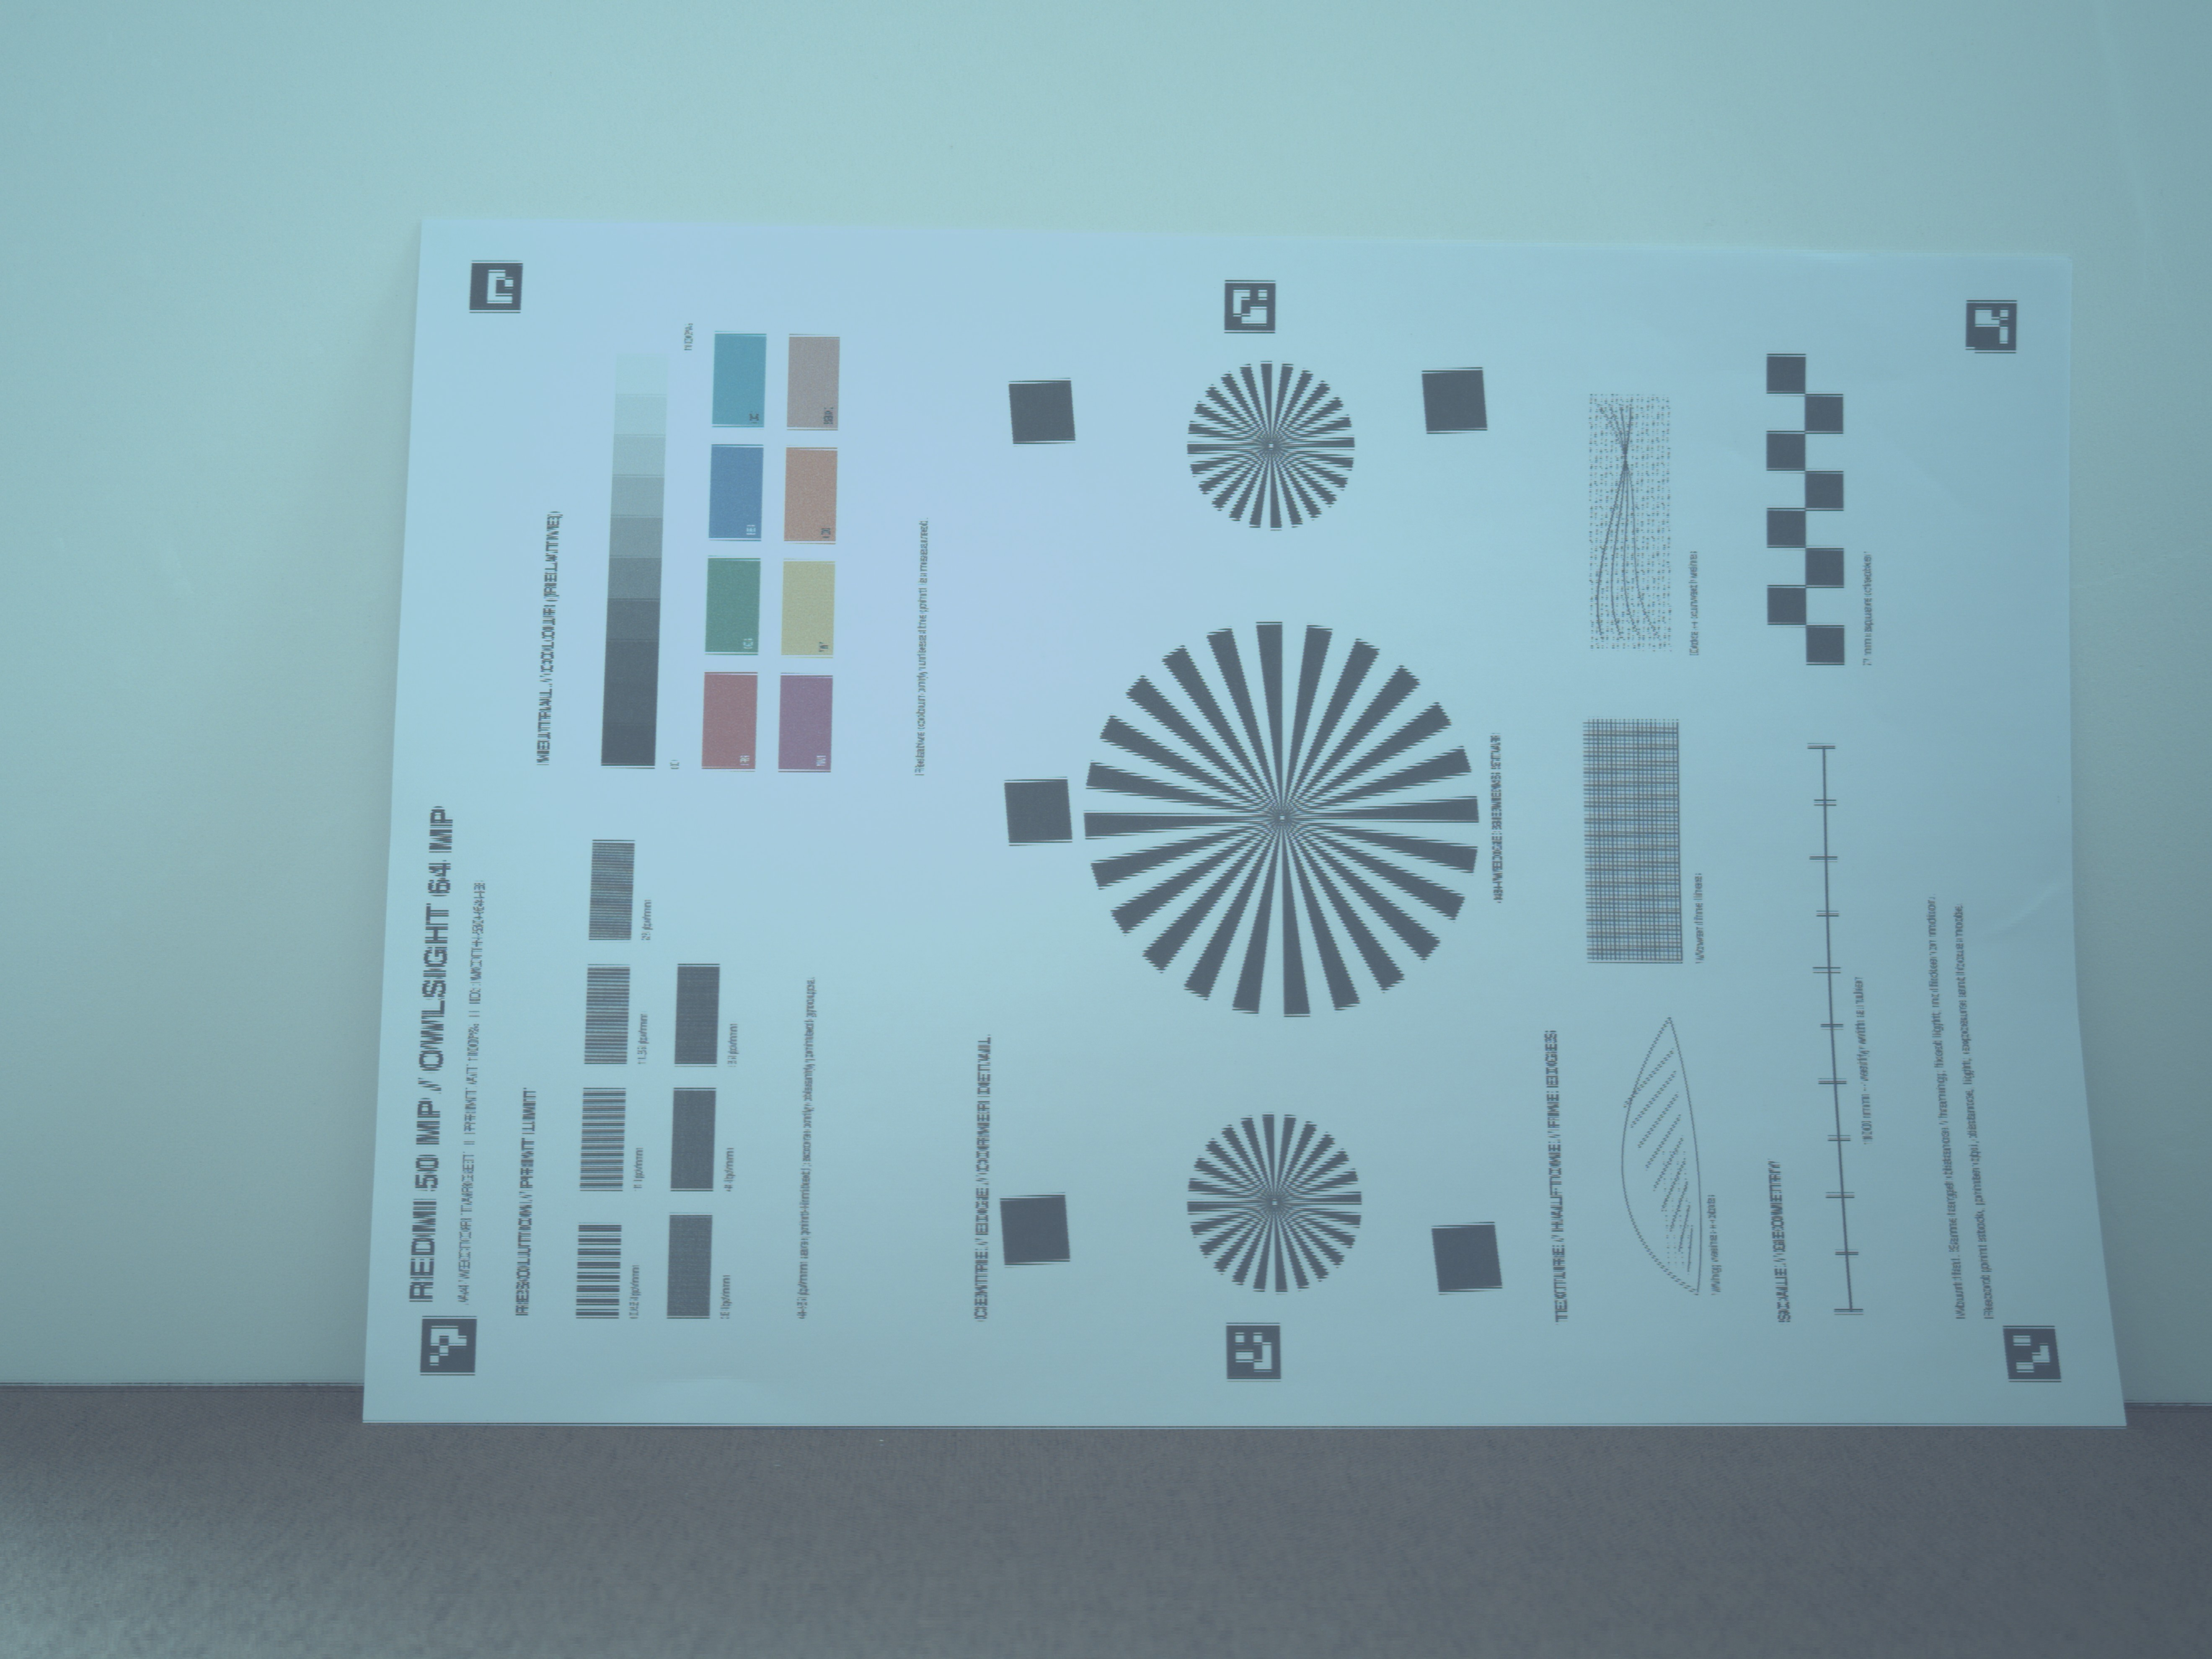
I started with a wider 3840 × 3264 frame, about 12.5MP. The P4 saves a single exposure, then encodes it in JPEG strips because a full processed image will not fit comfortably in memory. That first JPEG was blue and low in contrast, with visibly less fine detail than the Pi.
Next I got 15.7MP at 9248 × 1696, but that frame was a very wide, shallow slice. A centred digital crop from the sensor's full-width readout finally gave me a useful 4:3 frame at 5280 × 3960, or 20.91MP. It is one native-pixel exposure, held in the P4's 32MB PSRAM, then encoded as 62 JPEG strips. In a timed capture, the exposure reached memory in about 0.54 seconds; processing and saving the whole event took about 19 seconds. Only about 2MB of PSRAM remained during the large capture.

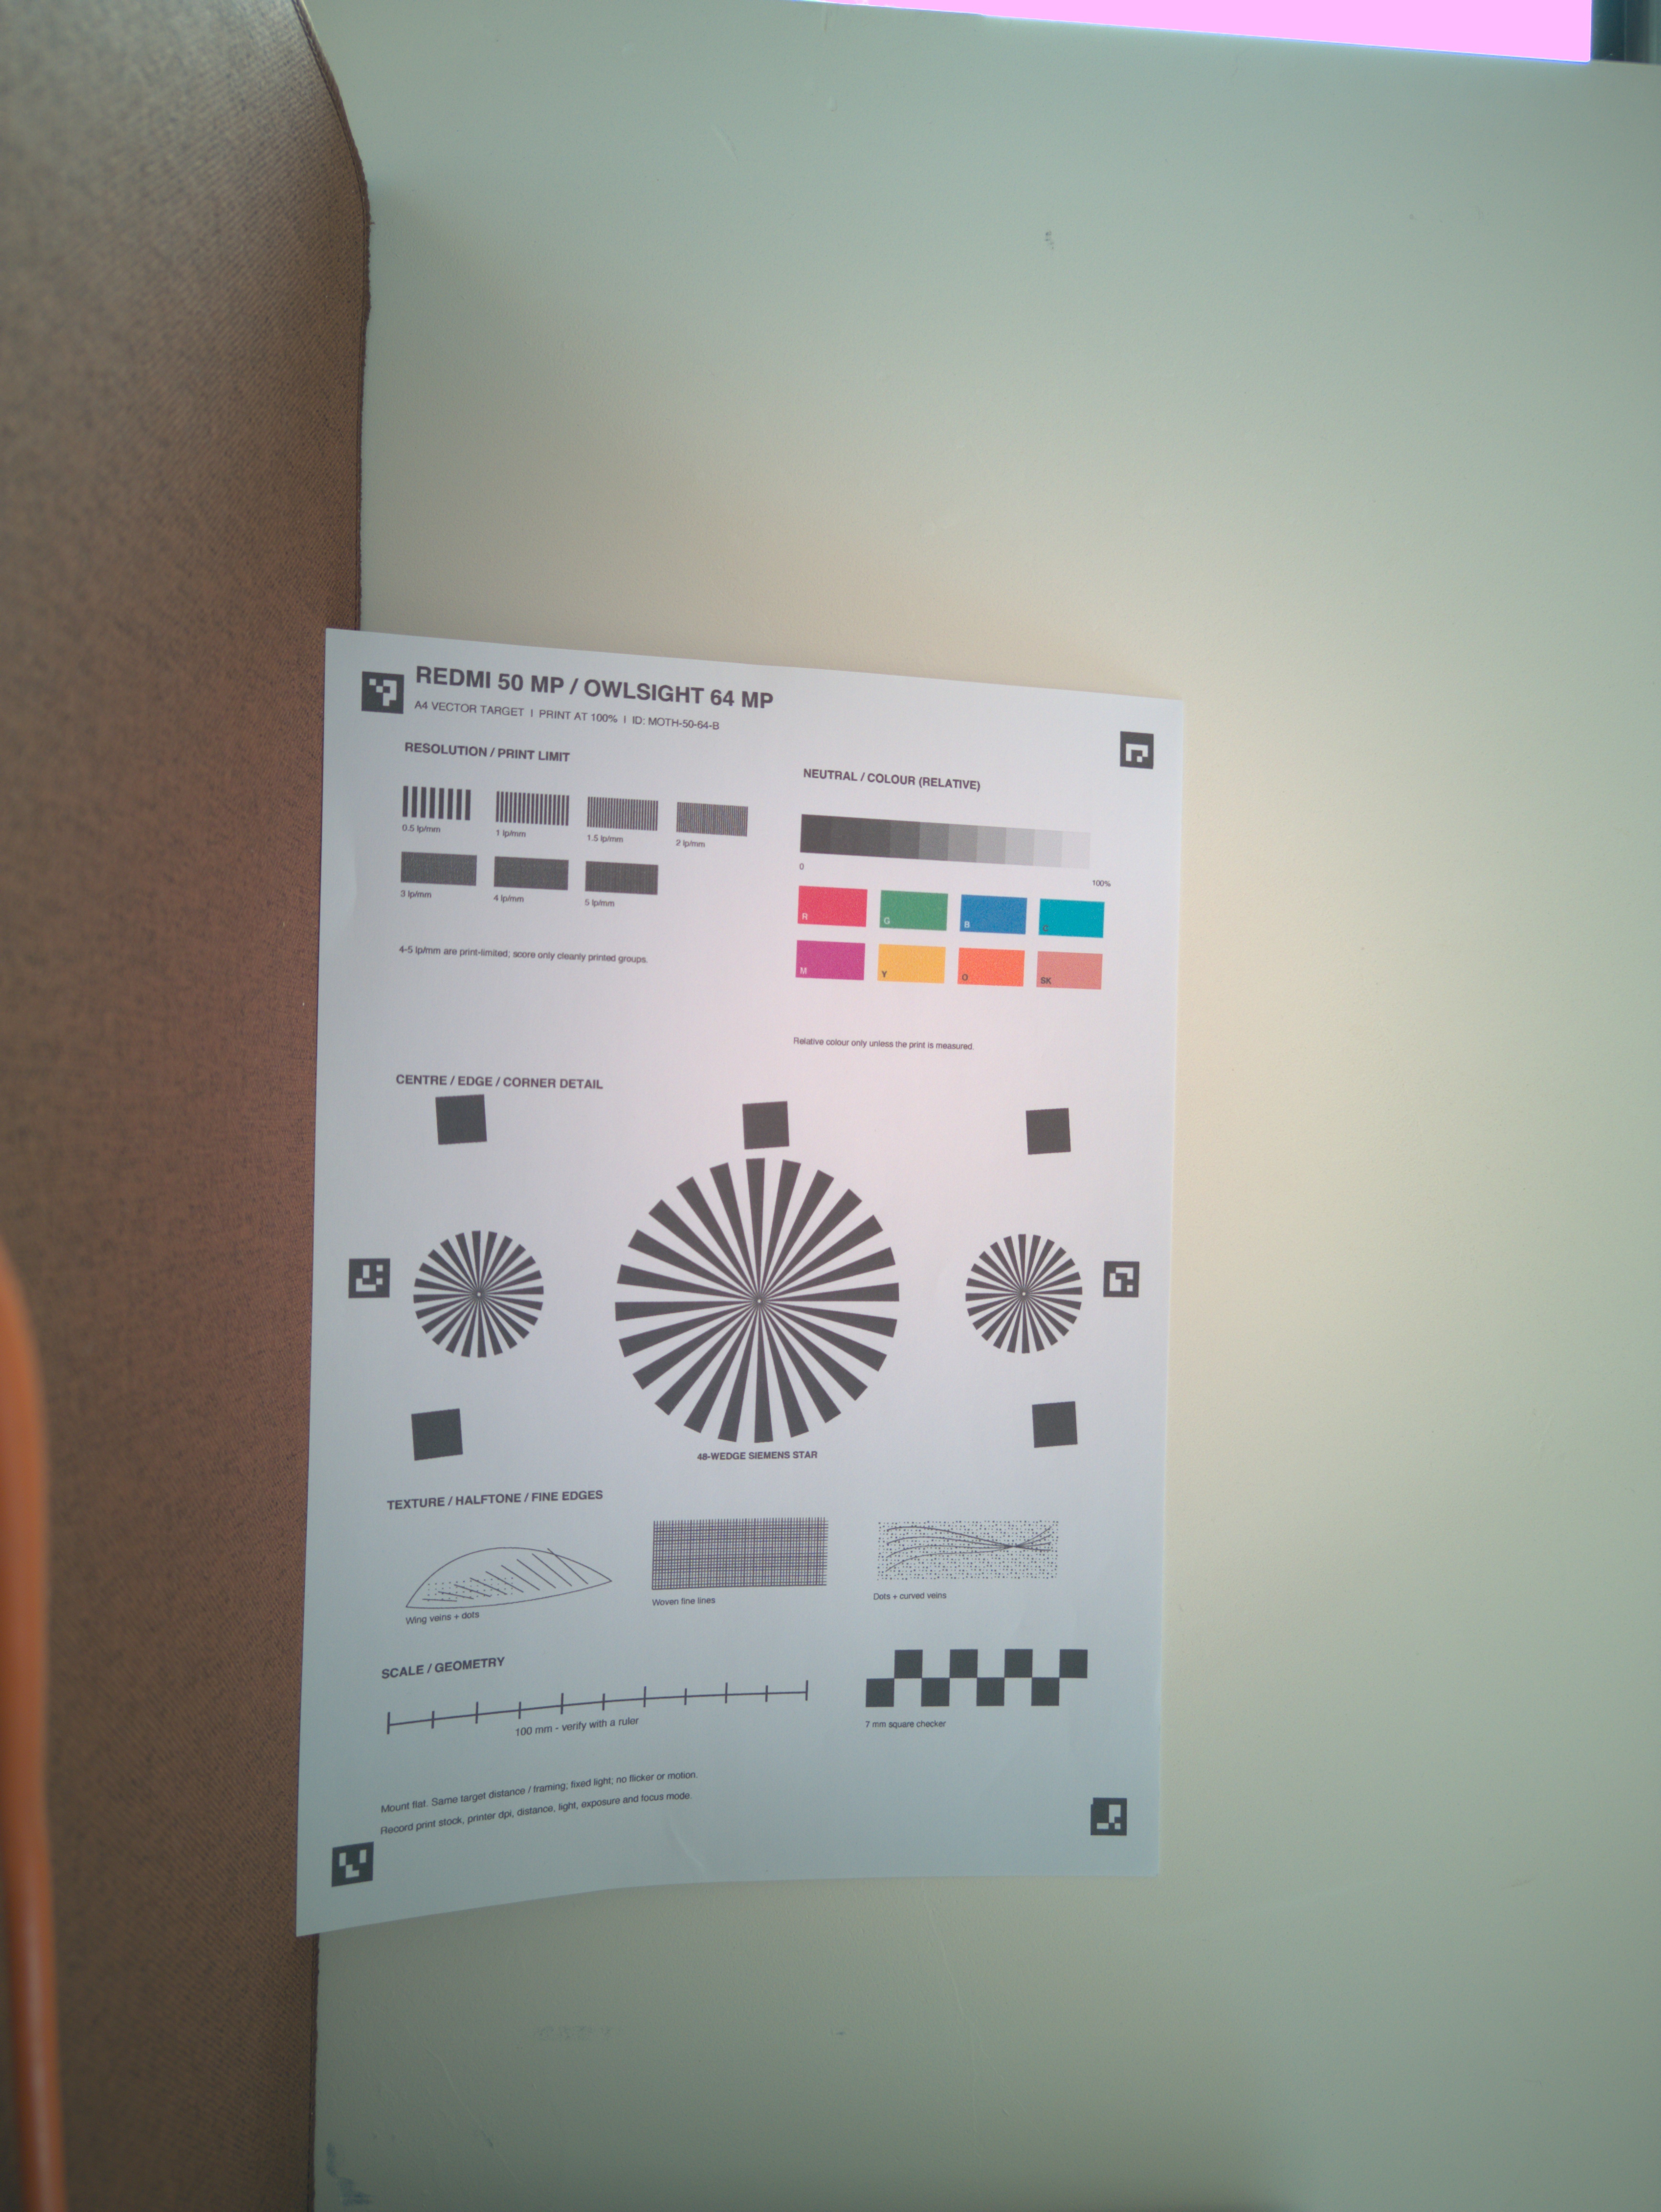
This 20.9MP mode sees a narrower part of the scene than the 12.5MP mode. I turned the P4 module a quarter turn to fit more of the A4 page. The image below is the result. The complete 5280 × 3960 file and Pi 64MP JPEG are available to inspect at their original sizes.
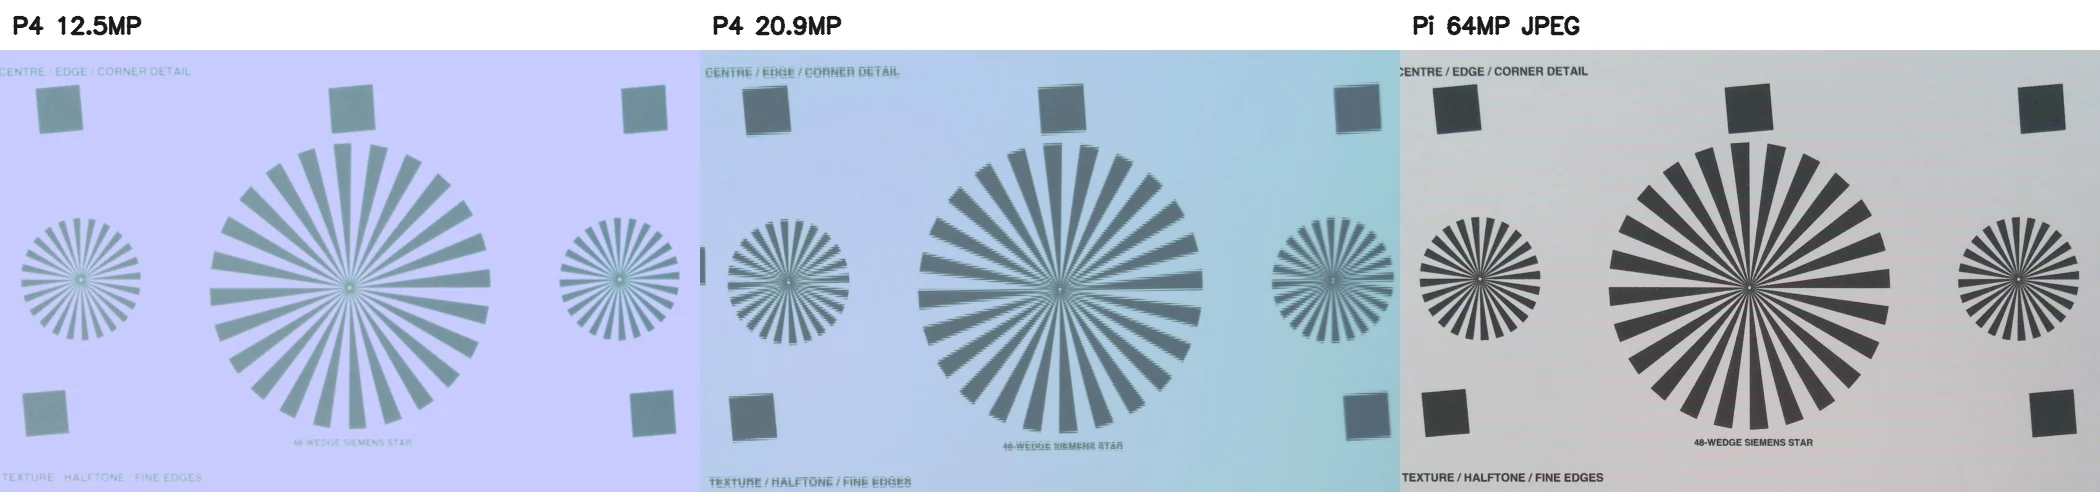
Across the chart, the 20.9MP P4 image and 64MP Pi image happened to put almost the same number of pixels on each millimetre of paper: about 13.6 and 13.7. The Pi's advantage in this crop is therefore not explained by the megapixel labels. The lenses, focus, exposure and image processing all contribute. These daylight pictures were taken separately, not with synchronized shutters.
What processing changes
I saved the P4's packed ten-bit sensor data from the same exposure as its 20.9MP JPEG. The red and blue patches confirm that the Bayer pattern in my code is in the right place. The 20.9MP frame is a native-pixel crop; it is not a binned 20MP image. The wider 12.5MP P4 mode uses vertical binning. A true 2 × 2 Quad Bayer bin gives about 16MP. That full-field mode initially timed out, but later on 17 November I got it working; the new results are below.
The P4 JPEG currently uses a simple demosaic, grey-world colour gains and an sRGB curve. The Pi applies more processing, including temperature-dependent white balance, a colour matrix, lens shading correction, a tone curve and sharpening. On the Mac I tried a black-level adjustment, paper-based white balance, edge-aware demosaic, a cautious amount of the Pi's colour matrix and tone curve, and gentle sharpening on the P4 RAW. This rendering uses the high eight bits of the saved ten-bit data, matching the precision of the existing P4 JPEG path.
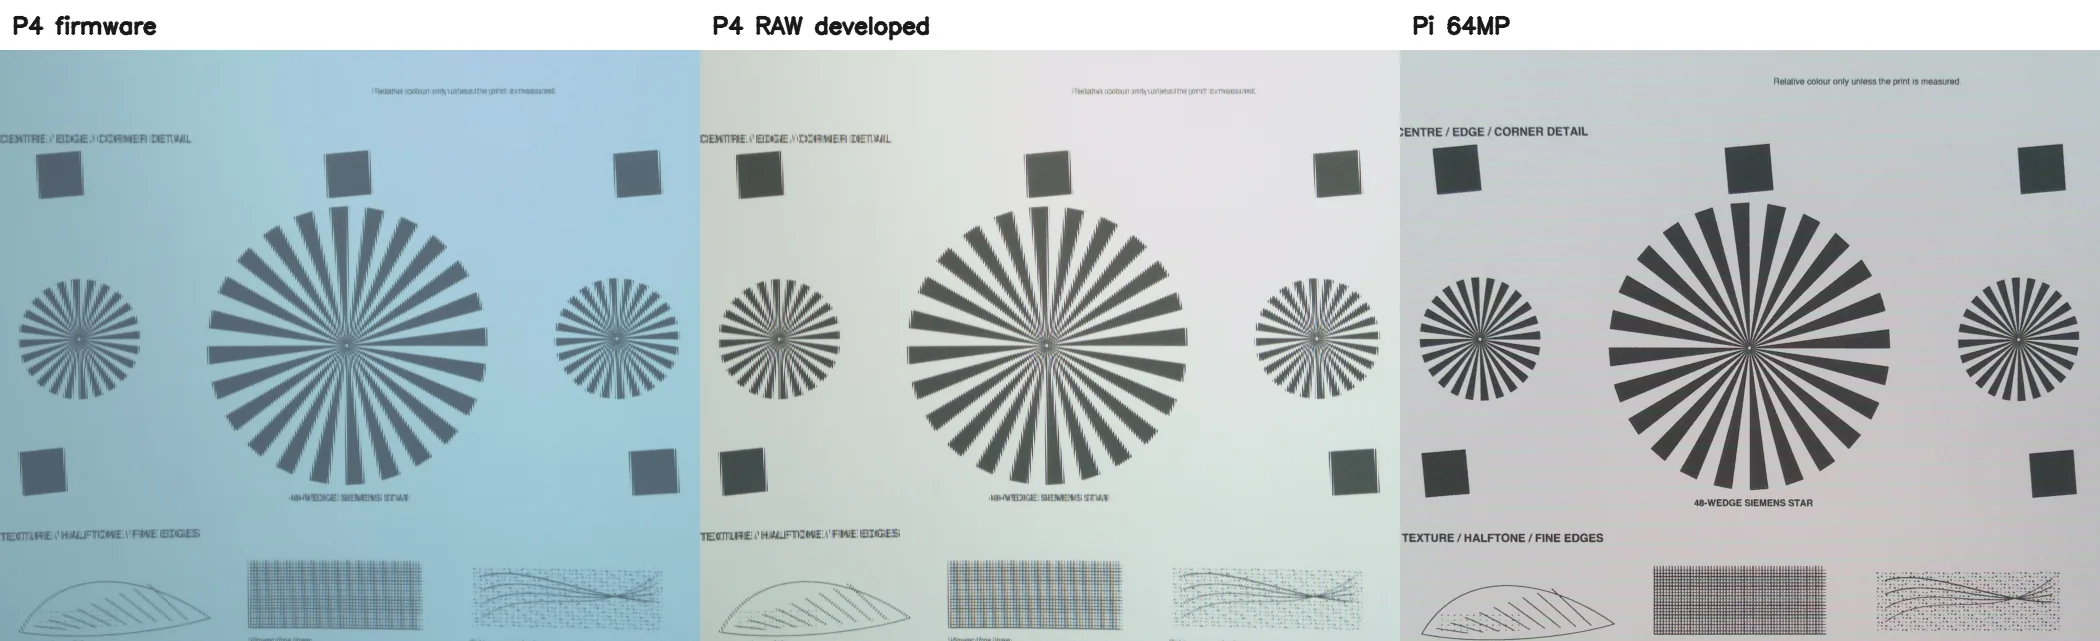
The RAW rendering is more neutral, but it does not fix the false detail where fine lines meet. The Pi's colour matrix belongs to its own calibrated pipeline; copying it directly into the P4 firmware would not give us calibrated moth colours. The P4 needs its own colour and lens-shading measurements. Its untouched RAW is still valuable for that work.
The full 16MP mode finally works
I kept at the sensor settings and got the full 4624 × 3472, 16.05MP mode working on the P4. The first successful change was one register: 0x5000 from 0xff to 0x01, the value used by the working UHD mode. The full-array geometry and the Linux driver's 2 × 2 subsampling/binning settings stayed the same. The P4 receives the entire 20,068,160-byte packed RAW10 frame from one exposure; this is not a resized 20MP crop.
After adjusting the line timing, four captures completed acquisition in 0.43–0.44 seconds. The slower fallback passed five captures at about 0.74 seconds. About 9.2MB of PSRAM remains free after allocating the RAW buffer. Processing and saving are additional: the complete diagnostic command, including autofocus and a RAW copy to the card, took about 17–22 seconds. This is still a bench build, and it still reports the existing PHY flag; it is not a claim of production reliability or an error-free link.
For a new comparison I used the full 16MP sensor mode on both the Pi and P4, with the same nominal 15ms exposure and 1× gain. All four chart corners fit. The two images put almost the same number of pixels on the paper: about 8.6 pixels/mm. These were sequential daylight captures, with separate lenses and autofocus, rather than synchronized shutters.
I developed both RAW files with the same black subtraction, 16-bit edge-aware demosaic, white-balance gains, colour matrix and sRGB curve. All ten input bits are retained through demosaic. No sharpening or lens-shading correction was added. The colour settings come from the Pi's capture metadata, so they remain an experiment on the P4 rather than a P4 colour calibration.
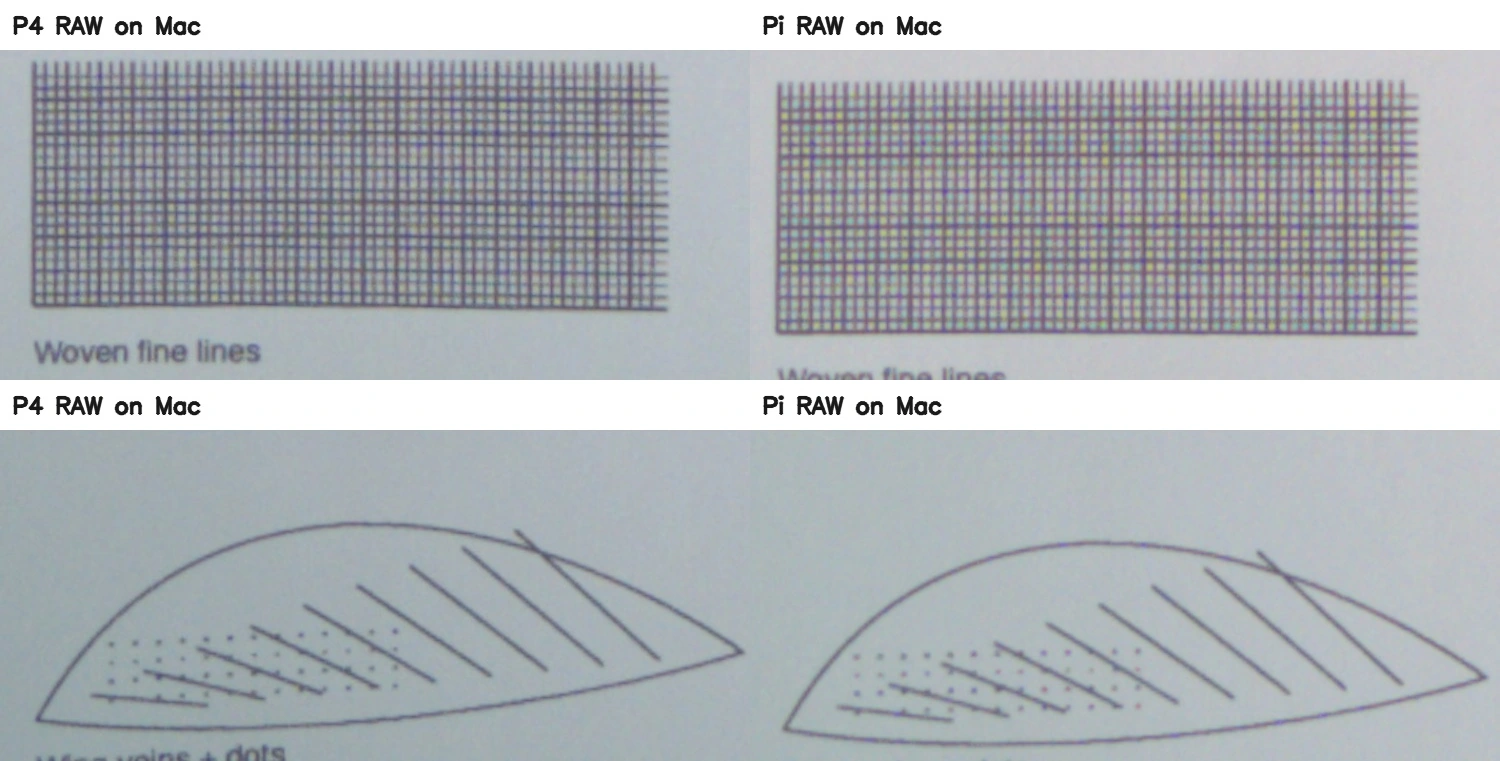
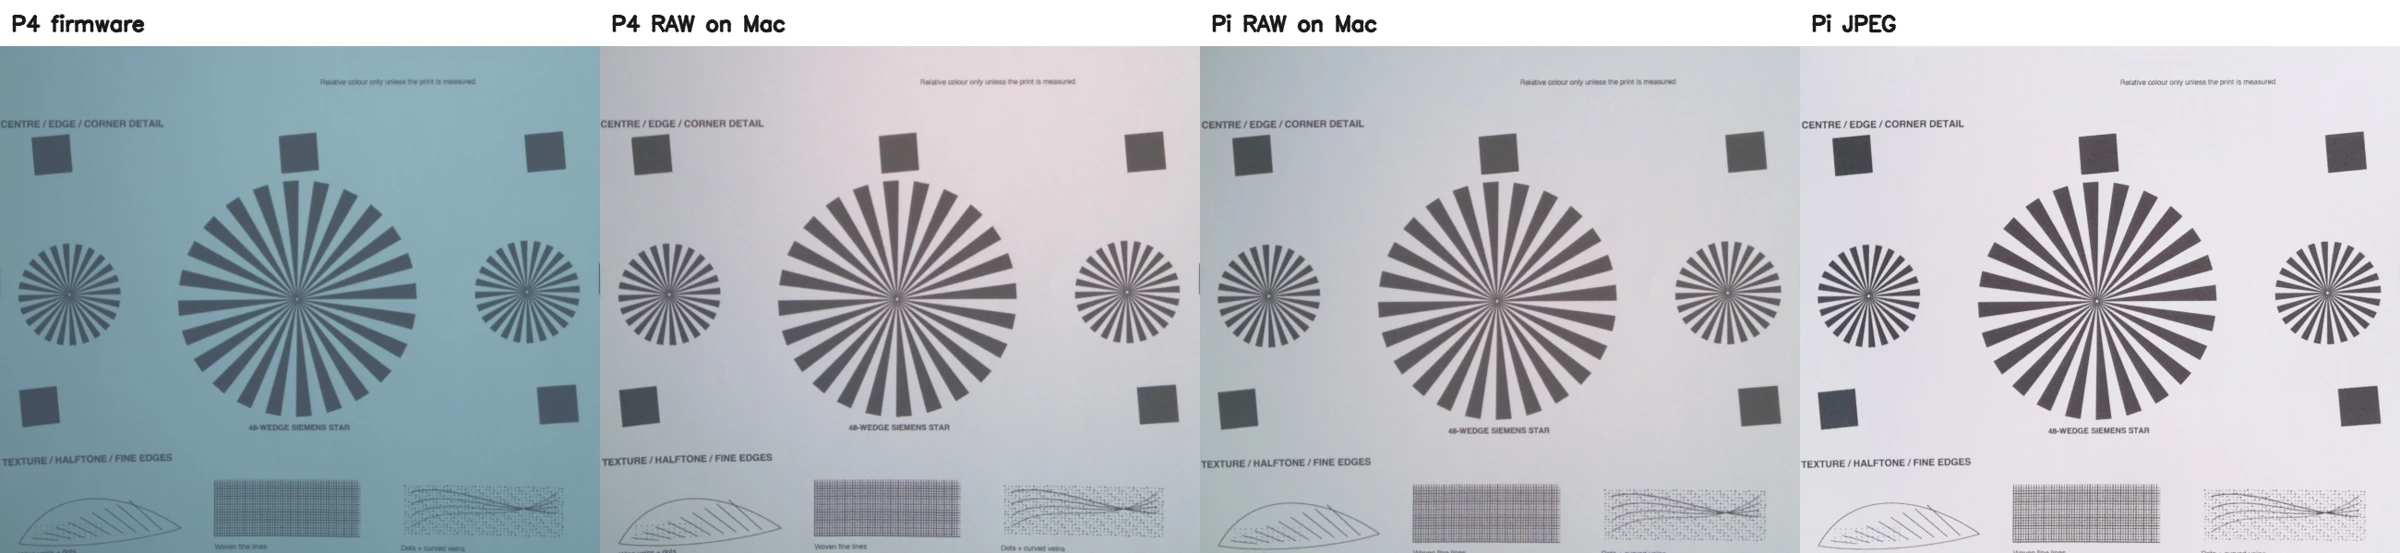
The gap is much smaller here. The median chart edge score was 1.60 line pairs/mm for the processed P4 RAW and 1.51 for the processed Pi RAW. I would not call a winner from that difference in a single pair. The P4 firmware JPEG scored 1.45 and the Pi's finished JPEG 1.79: the Pi's processing still makes a crisper finished image. The four-way comparison shows the P4 firmware JPEG, P4 RAW, Pi RAW and Pi JPEG together.
P4 16MP versus the full Pi 64MP
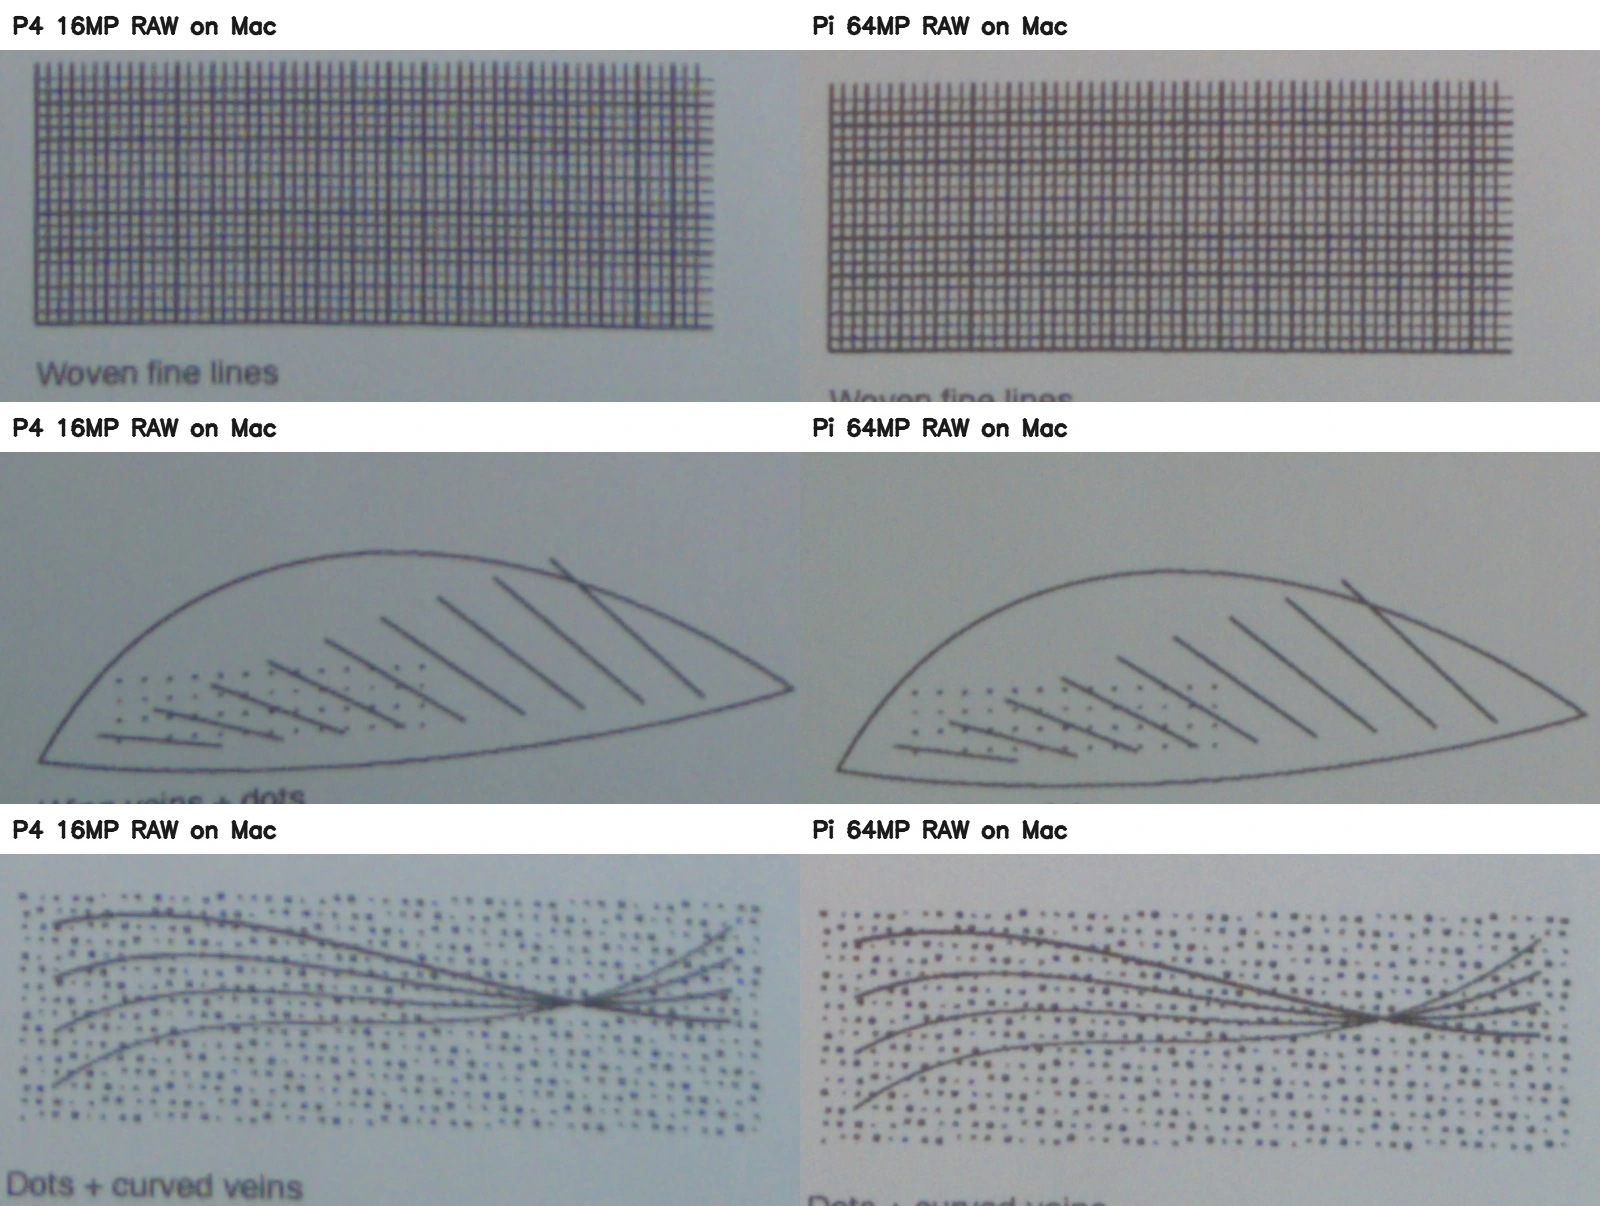
To be clear, the comparison immediately above uses 16MP on both cameras. I then took another pair with the P4 still in its 16MP binned mode and the Pi using the full 9248 × 6944, 64MP mode. Both saved RAW and JPEG from their respective exposures. Reported exposures were 15.015ms on the P4 and 14.987ms on the Pi, both at 1× analogue gain. The Pi puts twice as many pixels across each millimetre of the chart: about 17.2 versus 8.6.
Here are the RAW files developed with the same black subtraction, 16-bit edge-aware demosaic, white balance, colour matrix and sRGB curve. Neither has added sharpening, denoising or lens-shading correction.
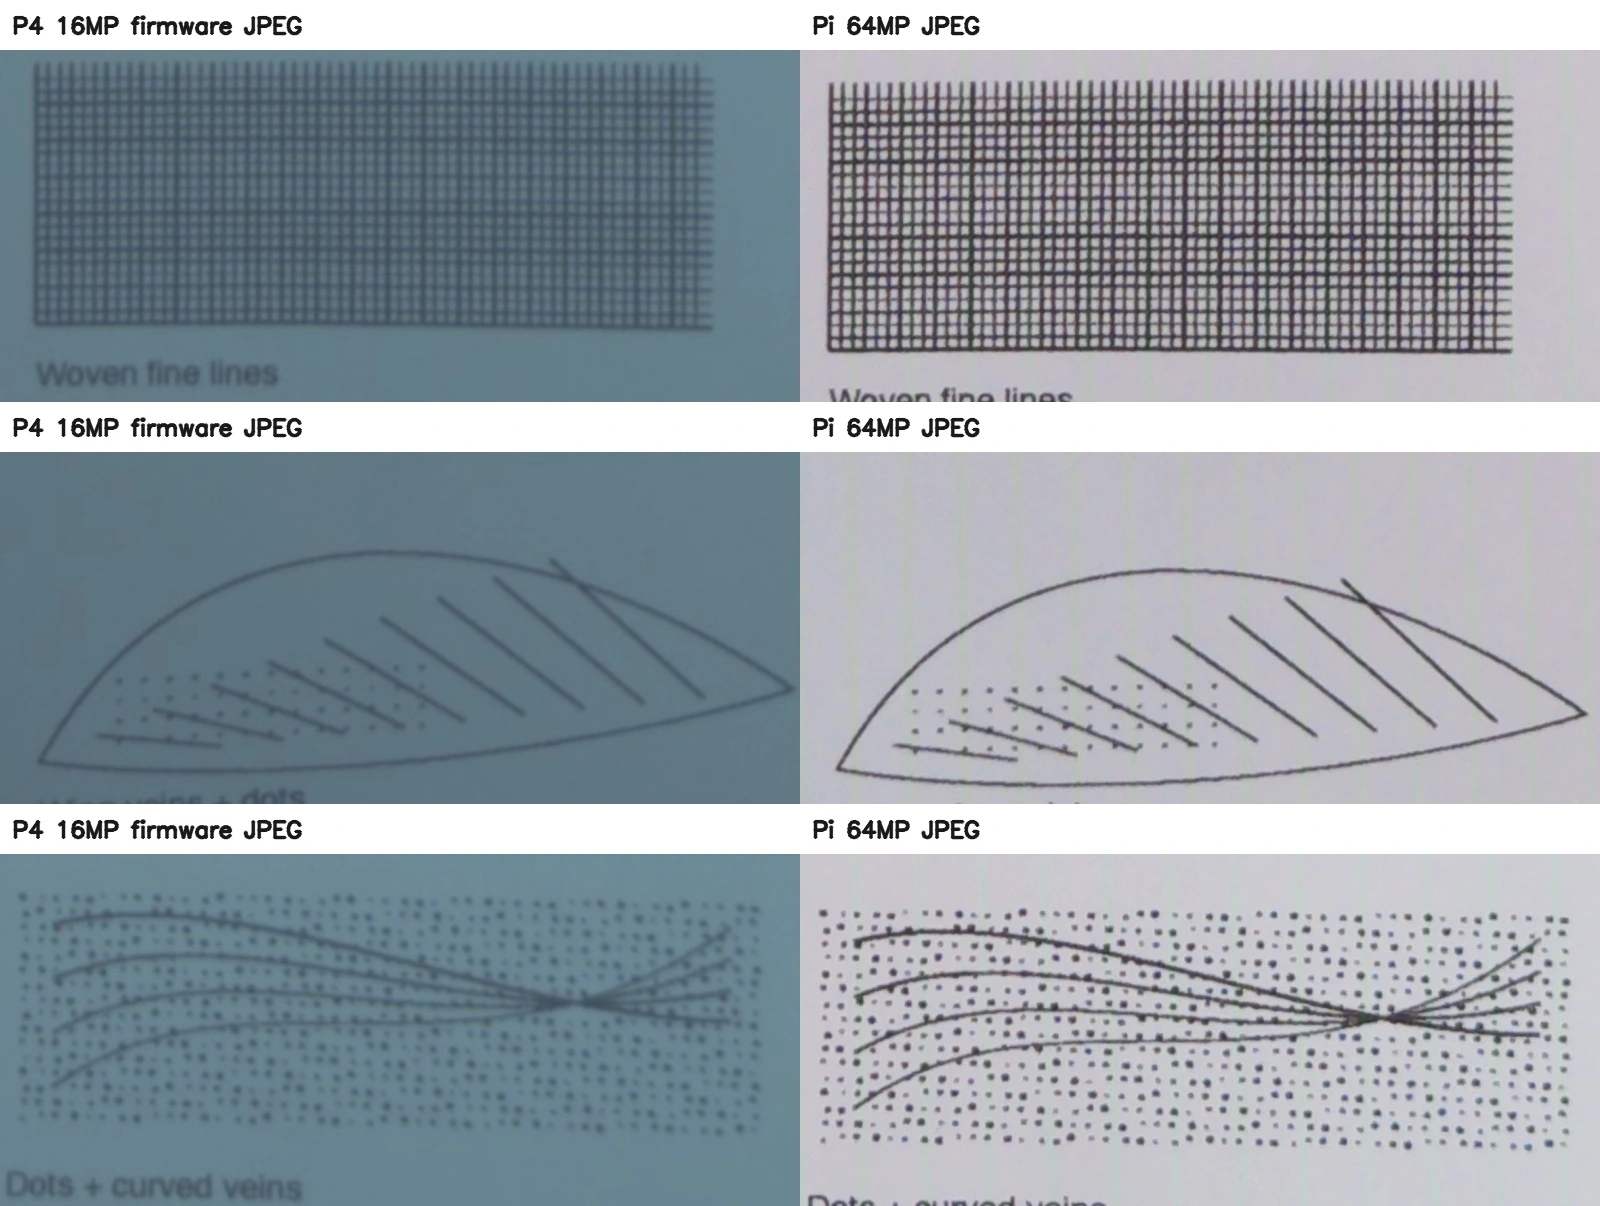
The original camera JPEGs show a much bigger difference:
| Rendered chart edge score, lp/mm | P4 16MP | Pi 64MP | Pi 64MP reduced to 16MP |
|---|---|---|---|
| RAW developed alike | 1.84 | 1.96 | 1.82 |
| Camera JPEG | 1.72 | 2.62 | 2.23 |
At full output size the Pi RAW has a modest edge-score advantage. After reducing it to 16MP, the RAW scores are effectively tied. That does not mean every fine pattern or noise characteristic is identical; the Pi still handles some fine patterns more cleanly. The equal-size RAW comparison and four-way view show the distinction. These numbers are from this new pair, analysed at 600dpi, and should not be compared directly with the earlier pair's scores.
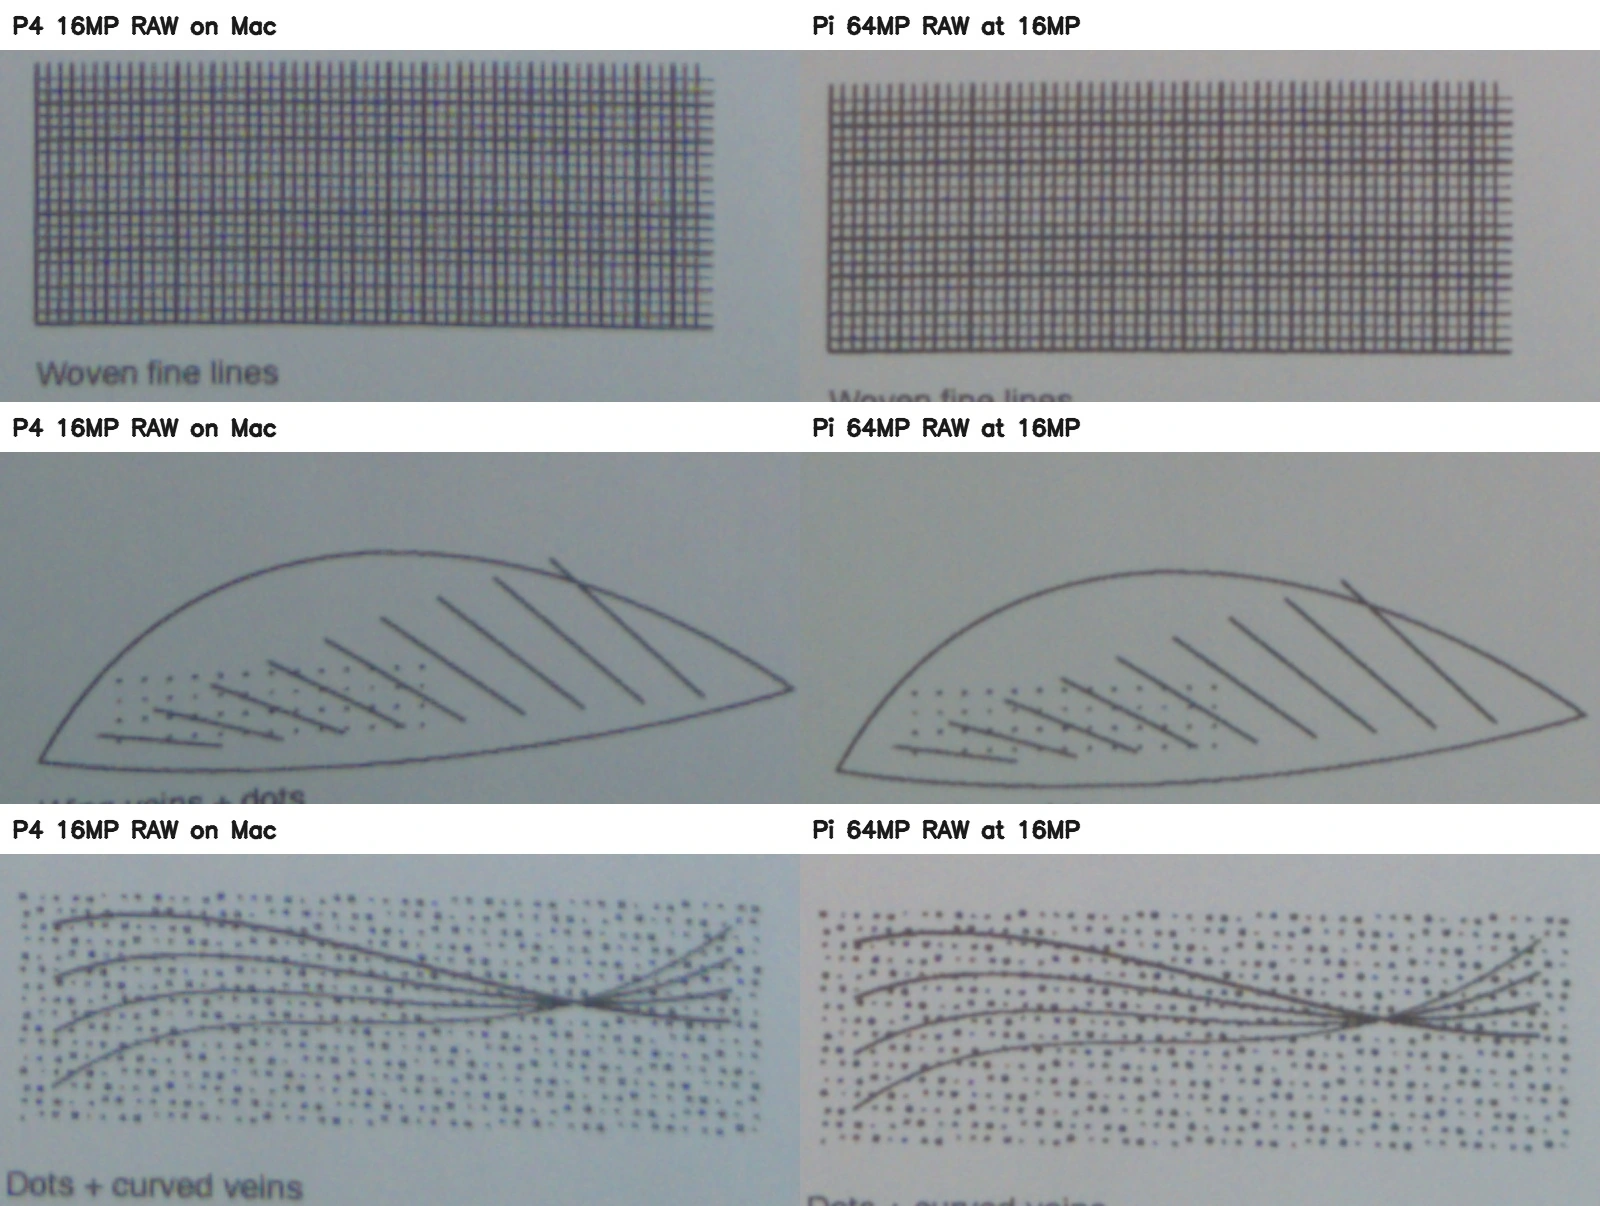
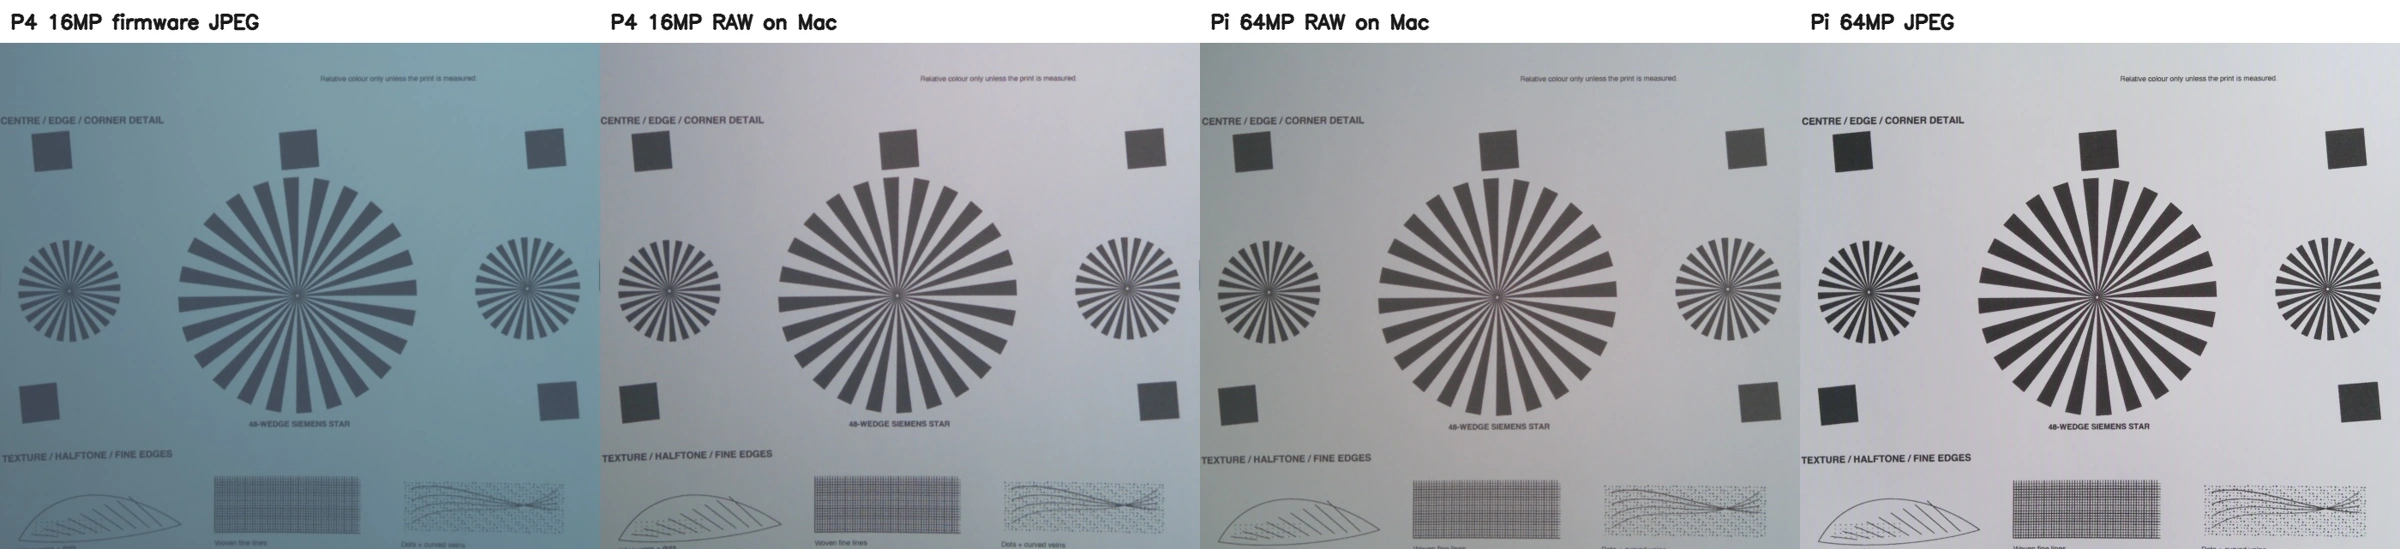
The full-size files are here: processed P4 16MP, processed Pi 64MP, and Pi's original 64MP JPEG. This remains a sequential daylight test with separate lenses and autofocus, a printed target, and borrowed Pi colour settings on the P4. It is not a calibrated colour or low-light noise test.
Making a better P4 JPEG on the Mac
The P4 RAW rendering already looked better than the firmware JPEG, especially in colour and brightness. “RAW” in these comparisons means a viewable image developed from the RAW data; the original sensor file does not have a finished look of its own. I went back to the same retained 16MP exposure to see how much further I could improve its JPEG.
I tried AHD and DCB demosaicing, black subtraction, the Pi capture's white balance and colour matrix, a smoother tone curve, colour adjustment, chroma smoothing and restrained sharpening. The selected AHD version takes about 4.1 seconds on the Mac to make one complete 4624 × 3472 JPEG, excluding capture and transfer. The P4 firmware has not changed.
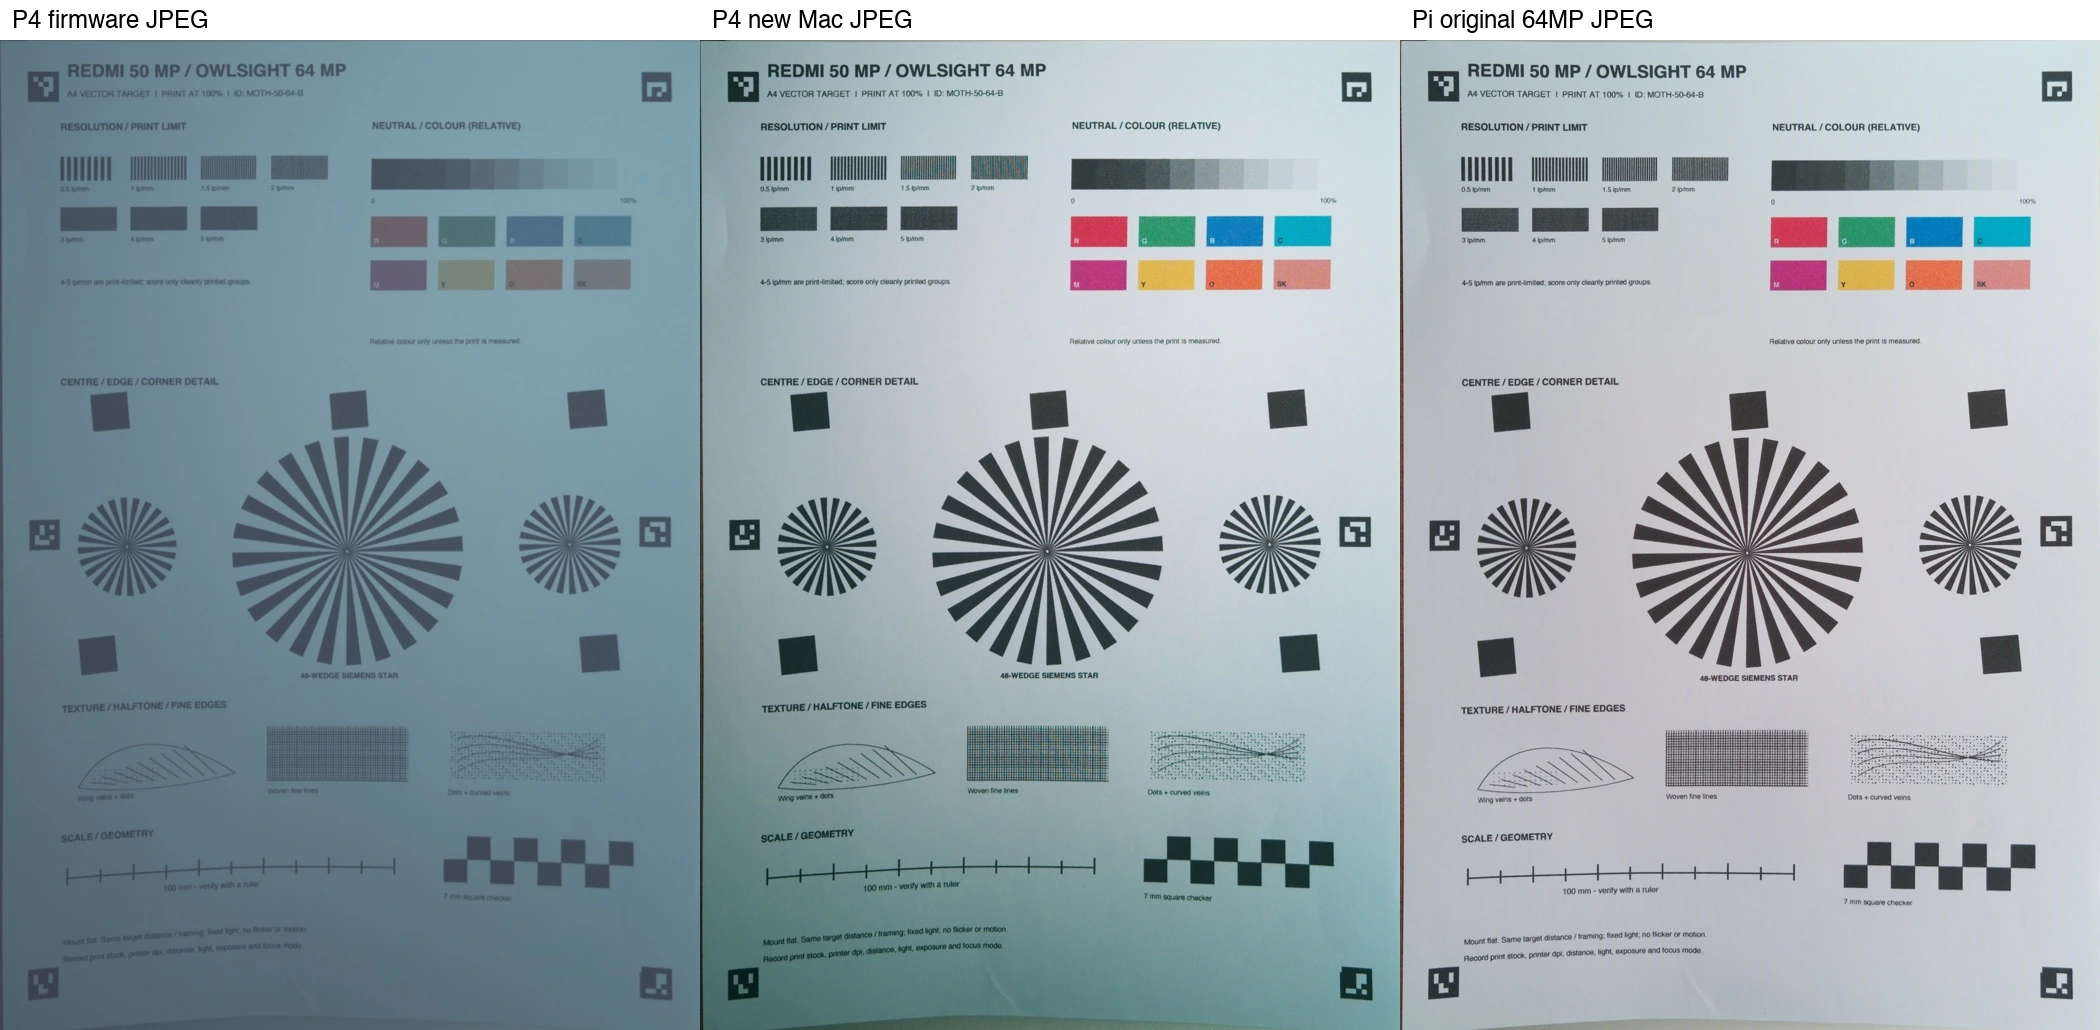
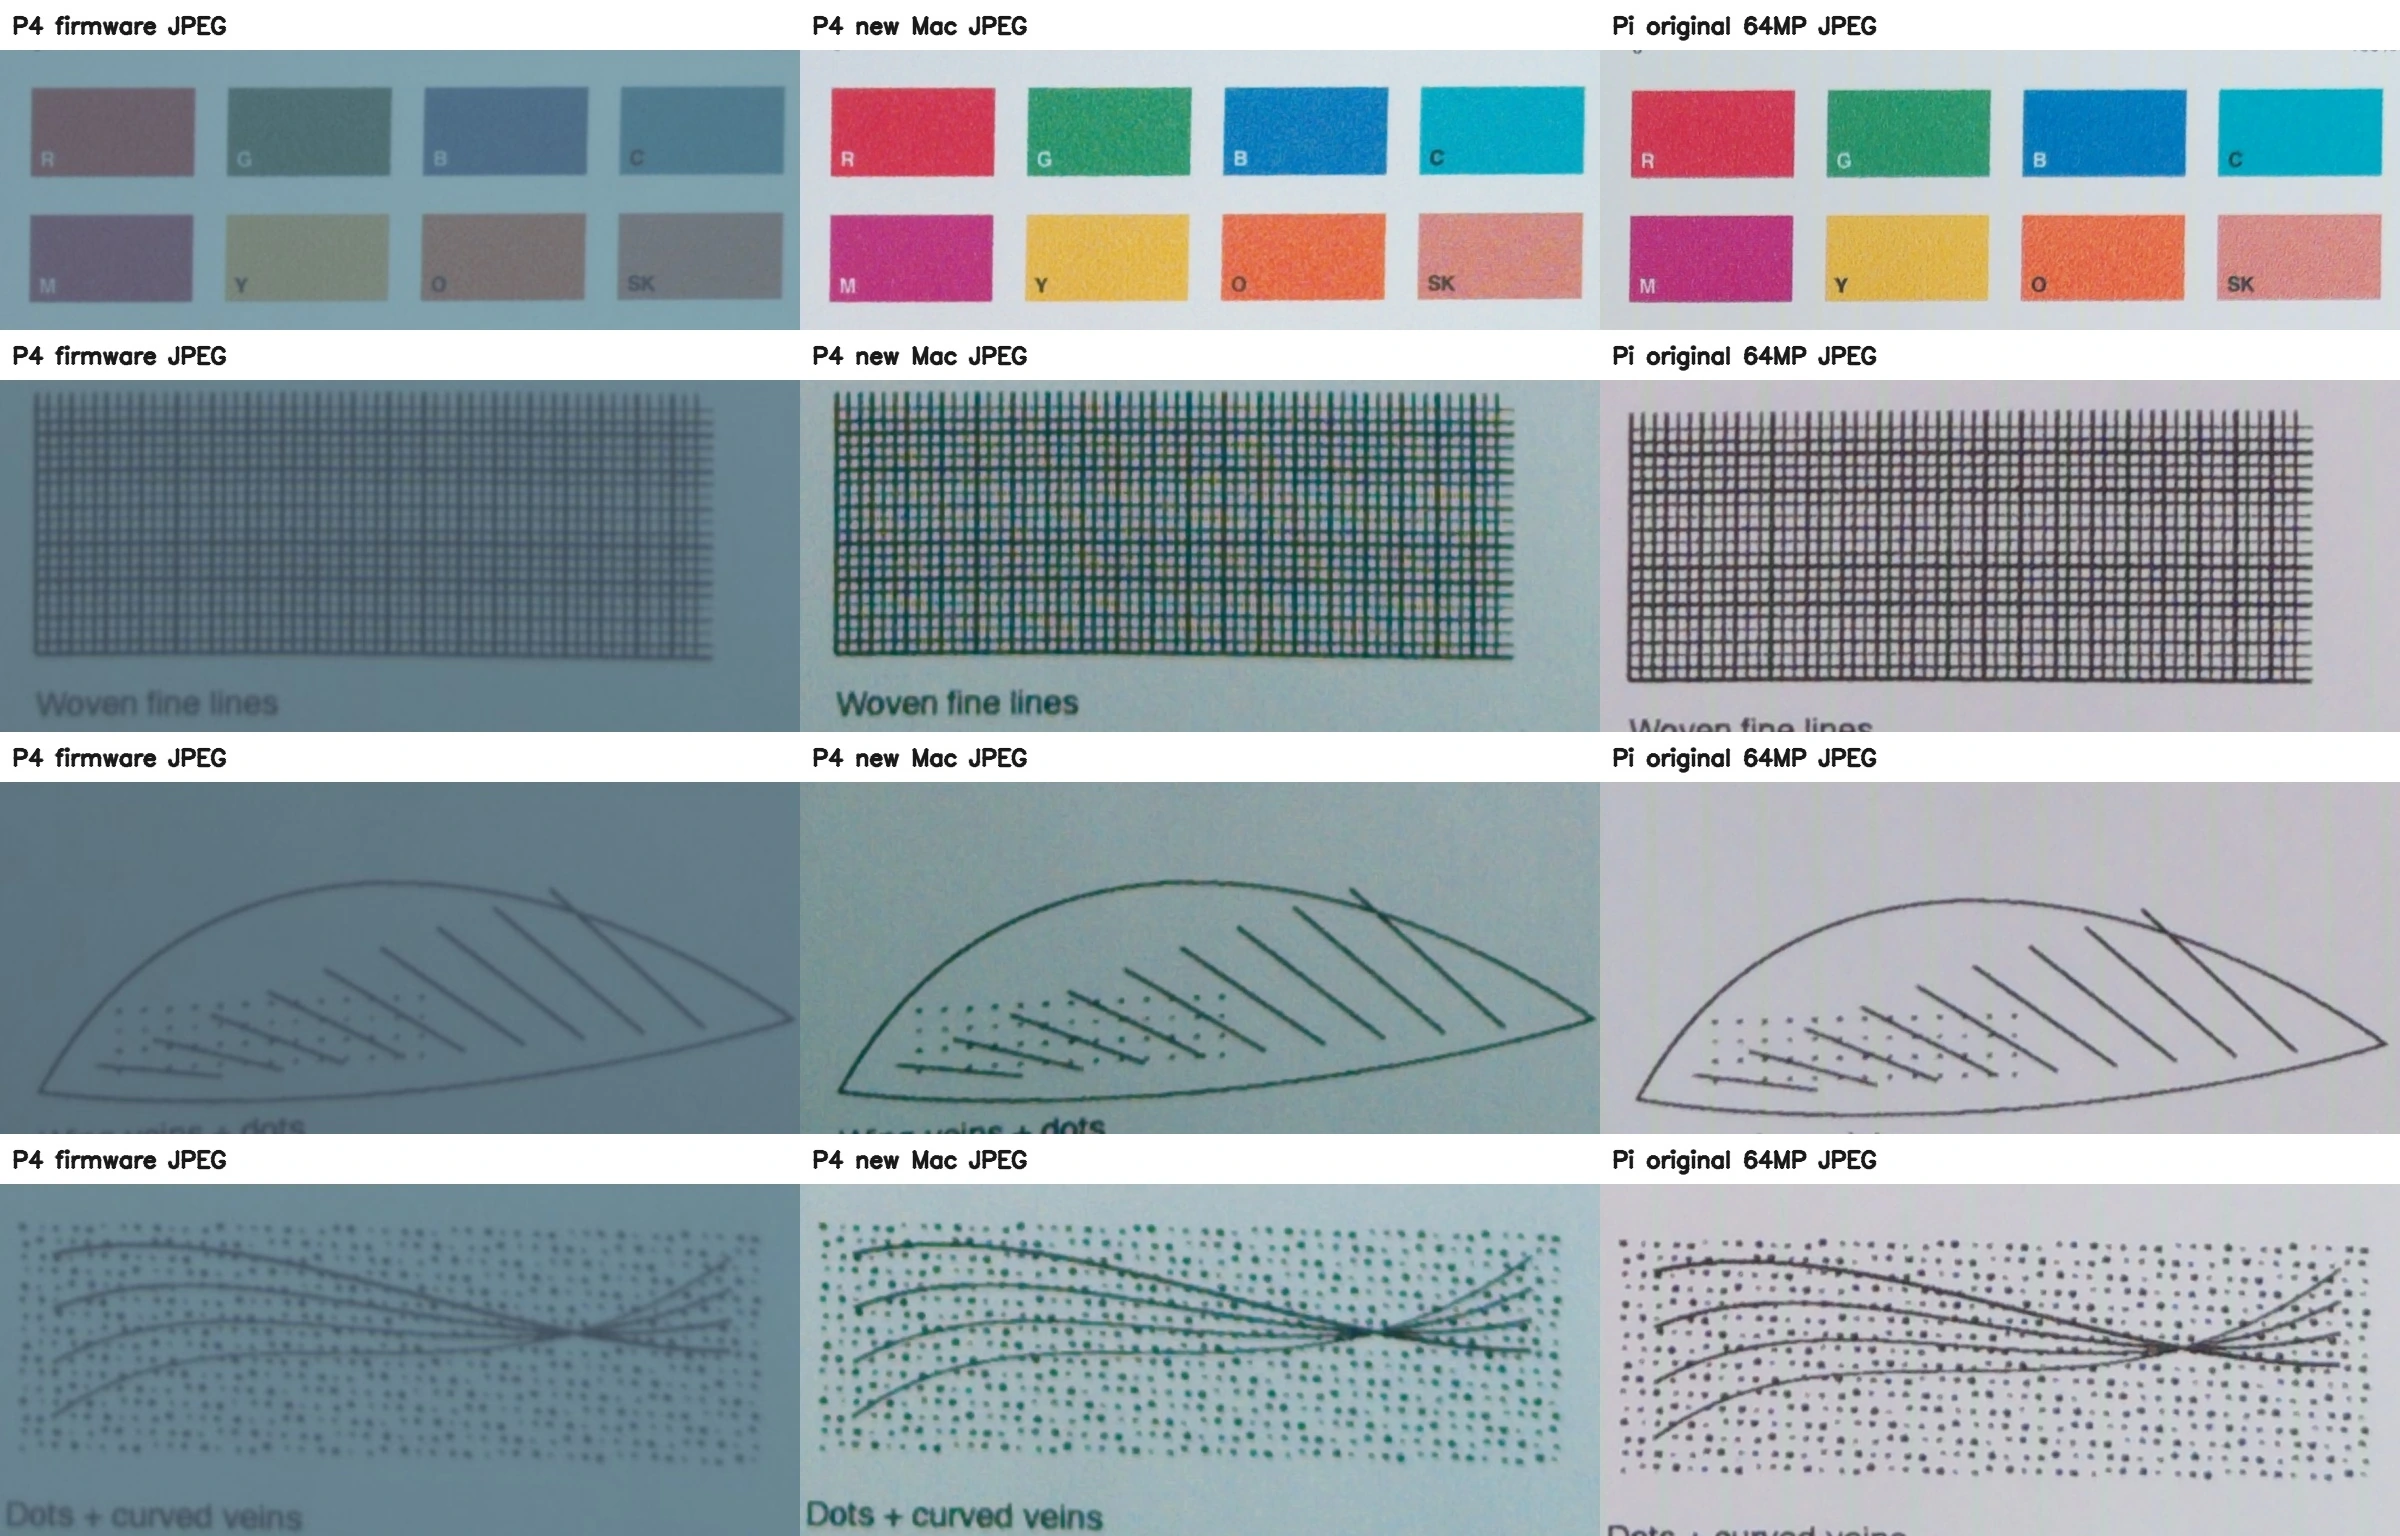
| Rendering of this pair | Median chart edge score, lp/mm |
|---|---|
| P4 firmware JPEG | 1.72 |
| P4 earlier basic RAW development | 1.84 |
| P4 new Mac-developed JPEG | 2.31 |
| Pi original 64MP JPEG | 2.62 |
The P4's edge score improves by about a third over its firmware JPEG. That is an improvement in the rendered image, not a third more sensor detail: sharpening and contrast affect this measure. The Pi still wins on the finest texture. More aggressive colour smoothing did not remove the P4's remaining aliasing.
The tone and global colour adjustments were fitted to the gray and colour patches in the recorded Pi JPEG. They do not copy any spatial detail from the Pi, but they are specific to this chart and daylight, not a measured colour calibration. The full improved 16MP JPEG and experimental processing profile are available here. The profile can develop another P4 RAW without needing another Pi image, but it still needs testing under other lighting.
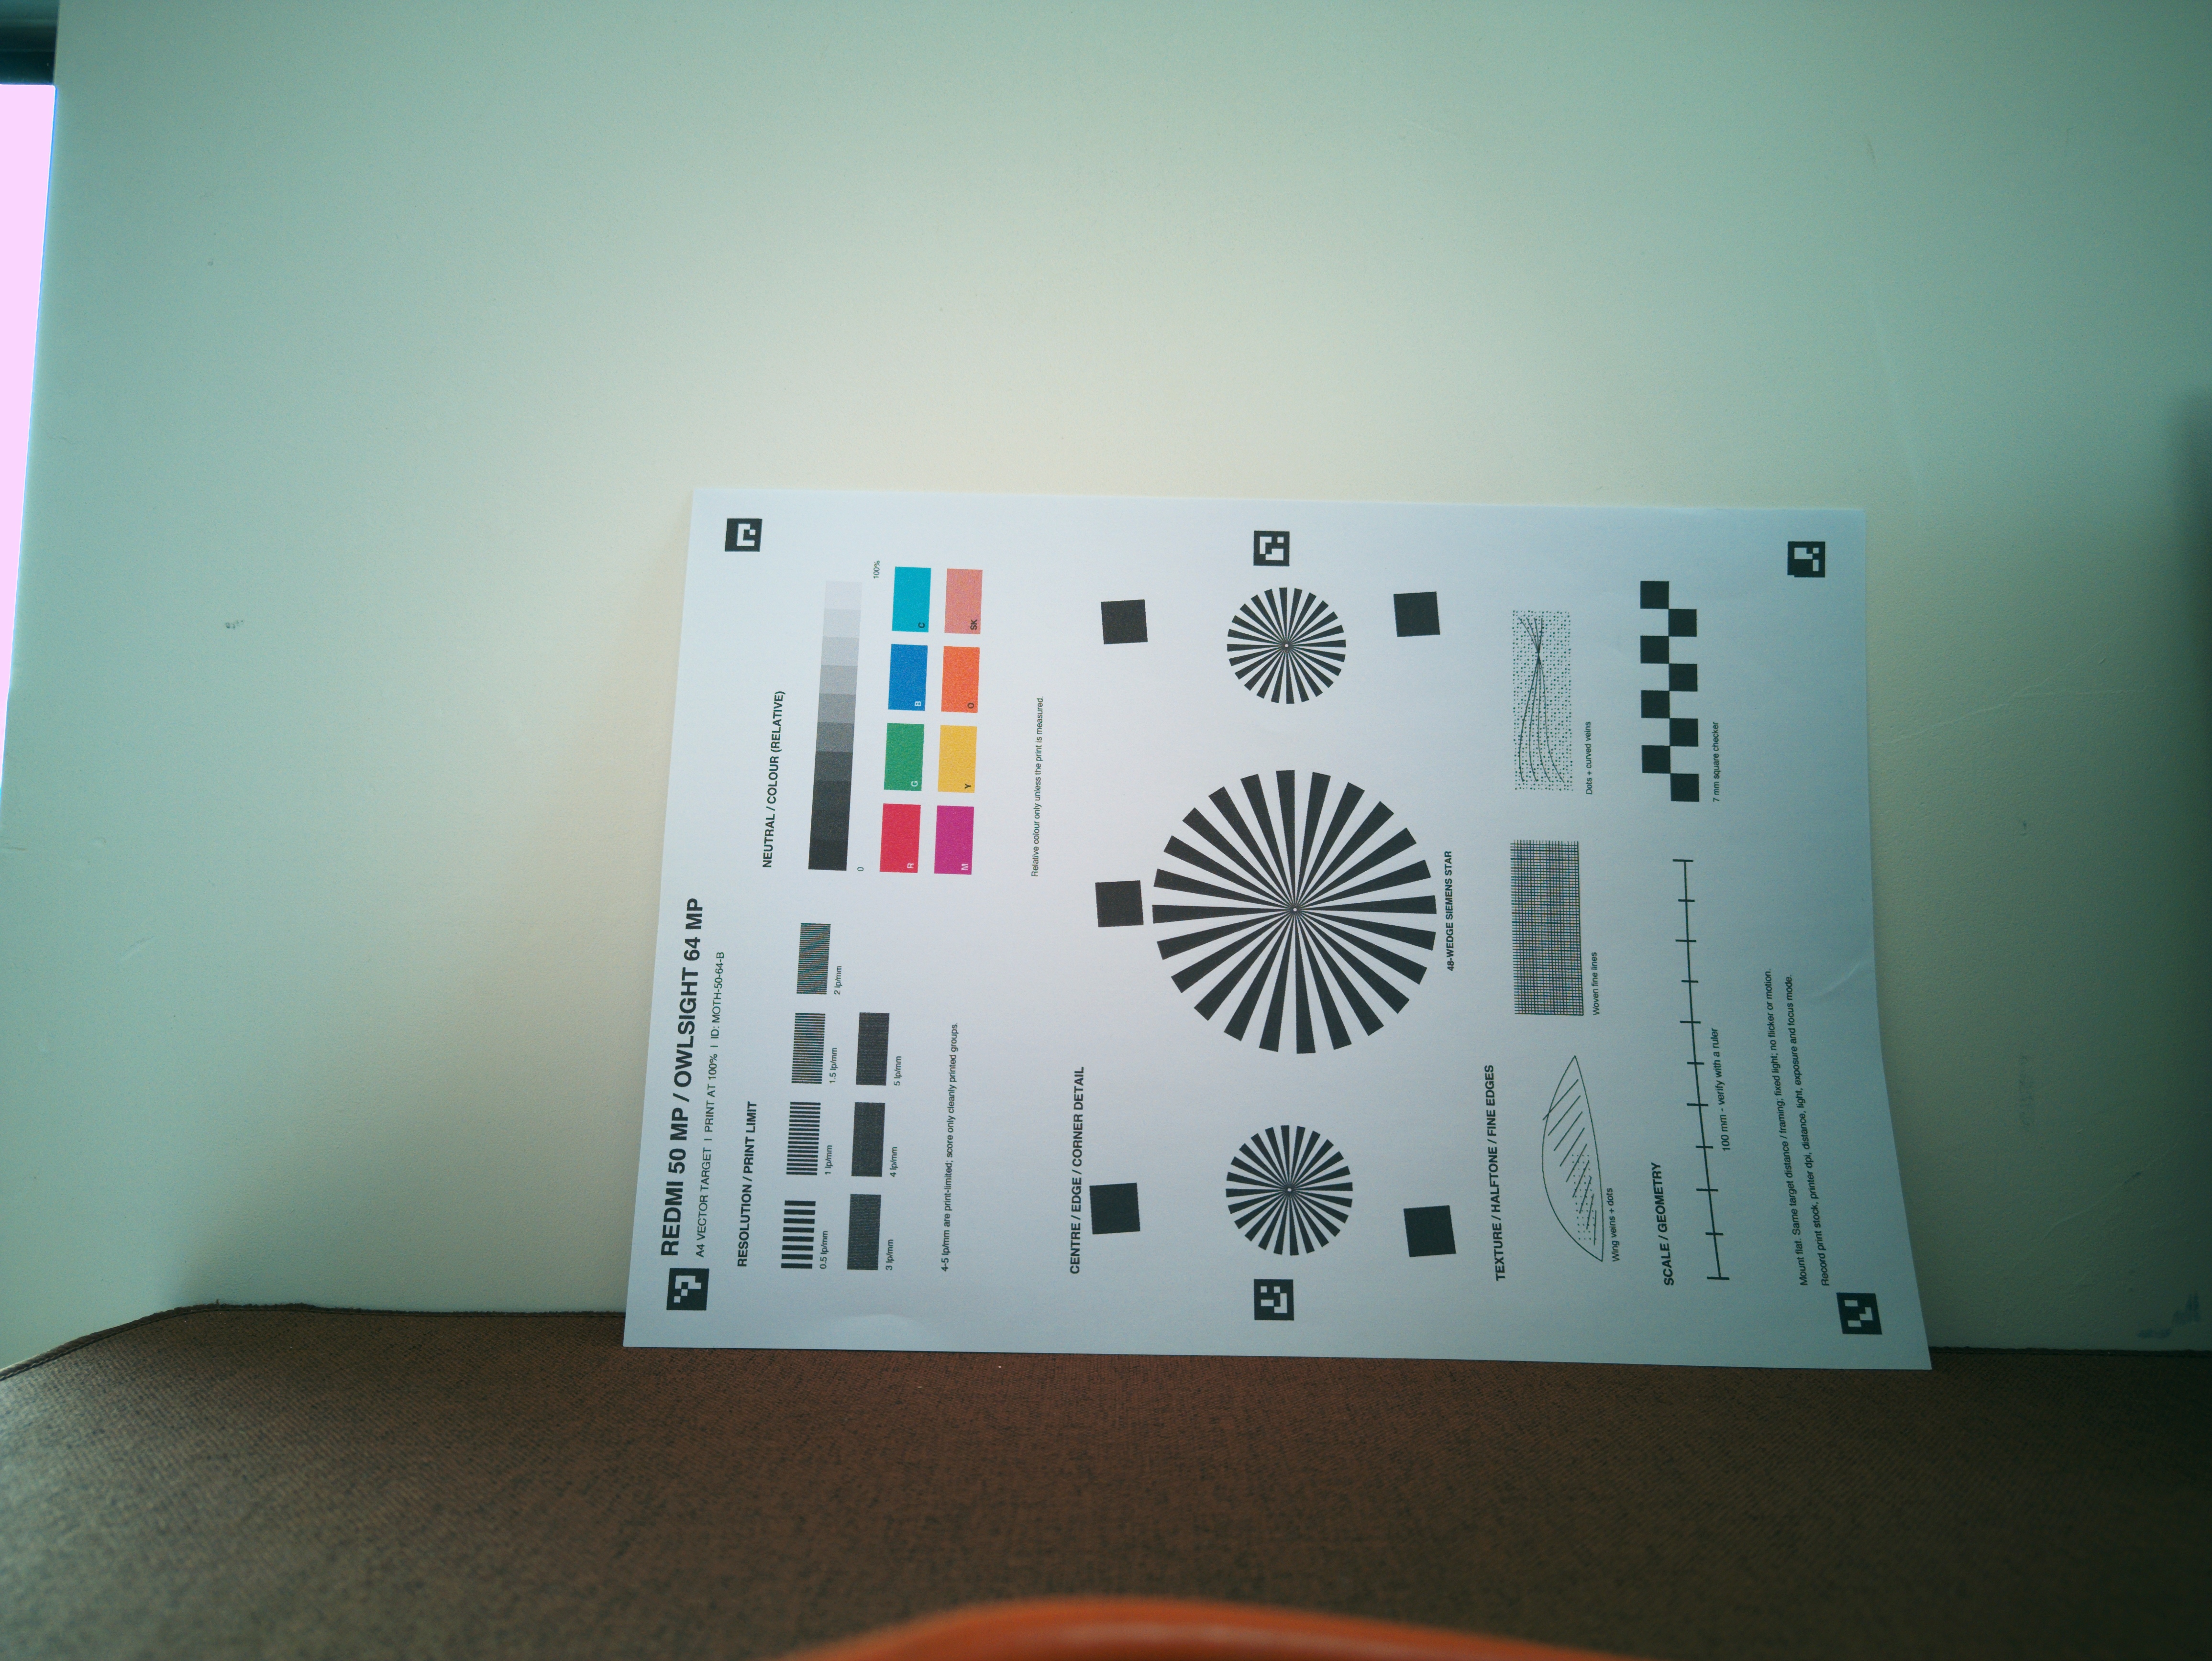
I also made a separate paper-balanced version using only the blank areas of the P4's sheet to estimate a smooth brightness and colour correction. It makes the sheet more even, but mixes real lighting with lens shading and paper shape, so I have kept it out of the camera score comparison. A proper flat-field and colour calibration are the next steps toward a profile that works beyond this scene.
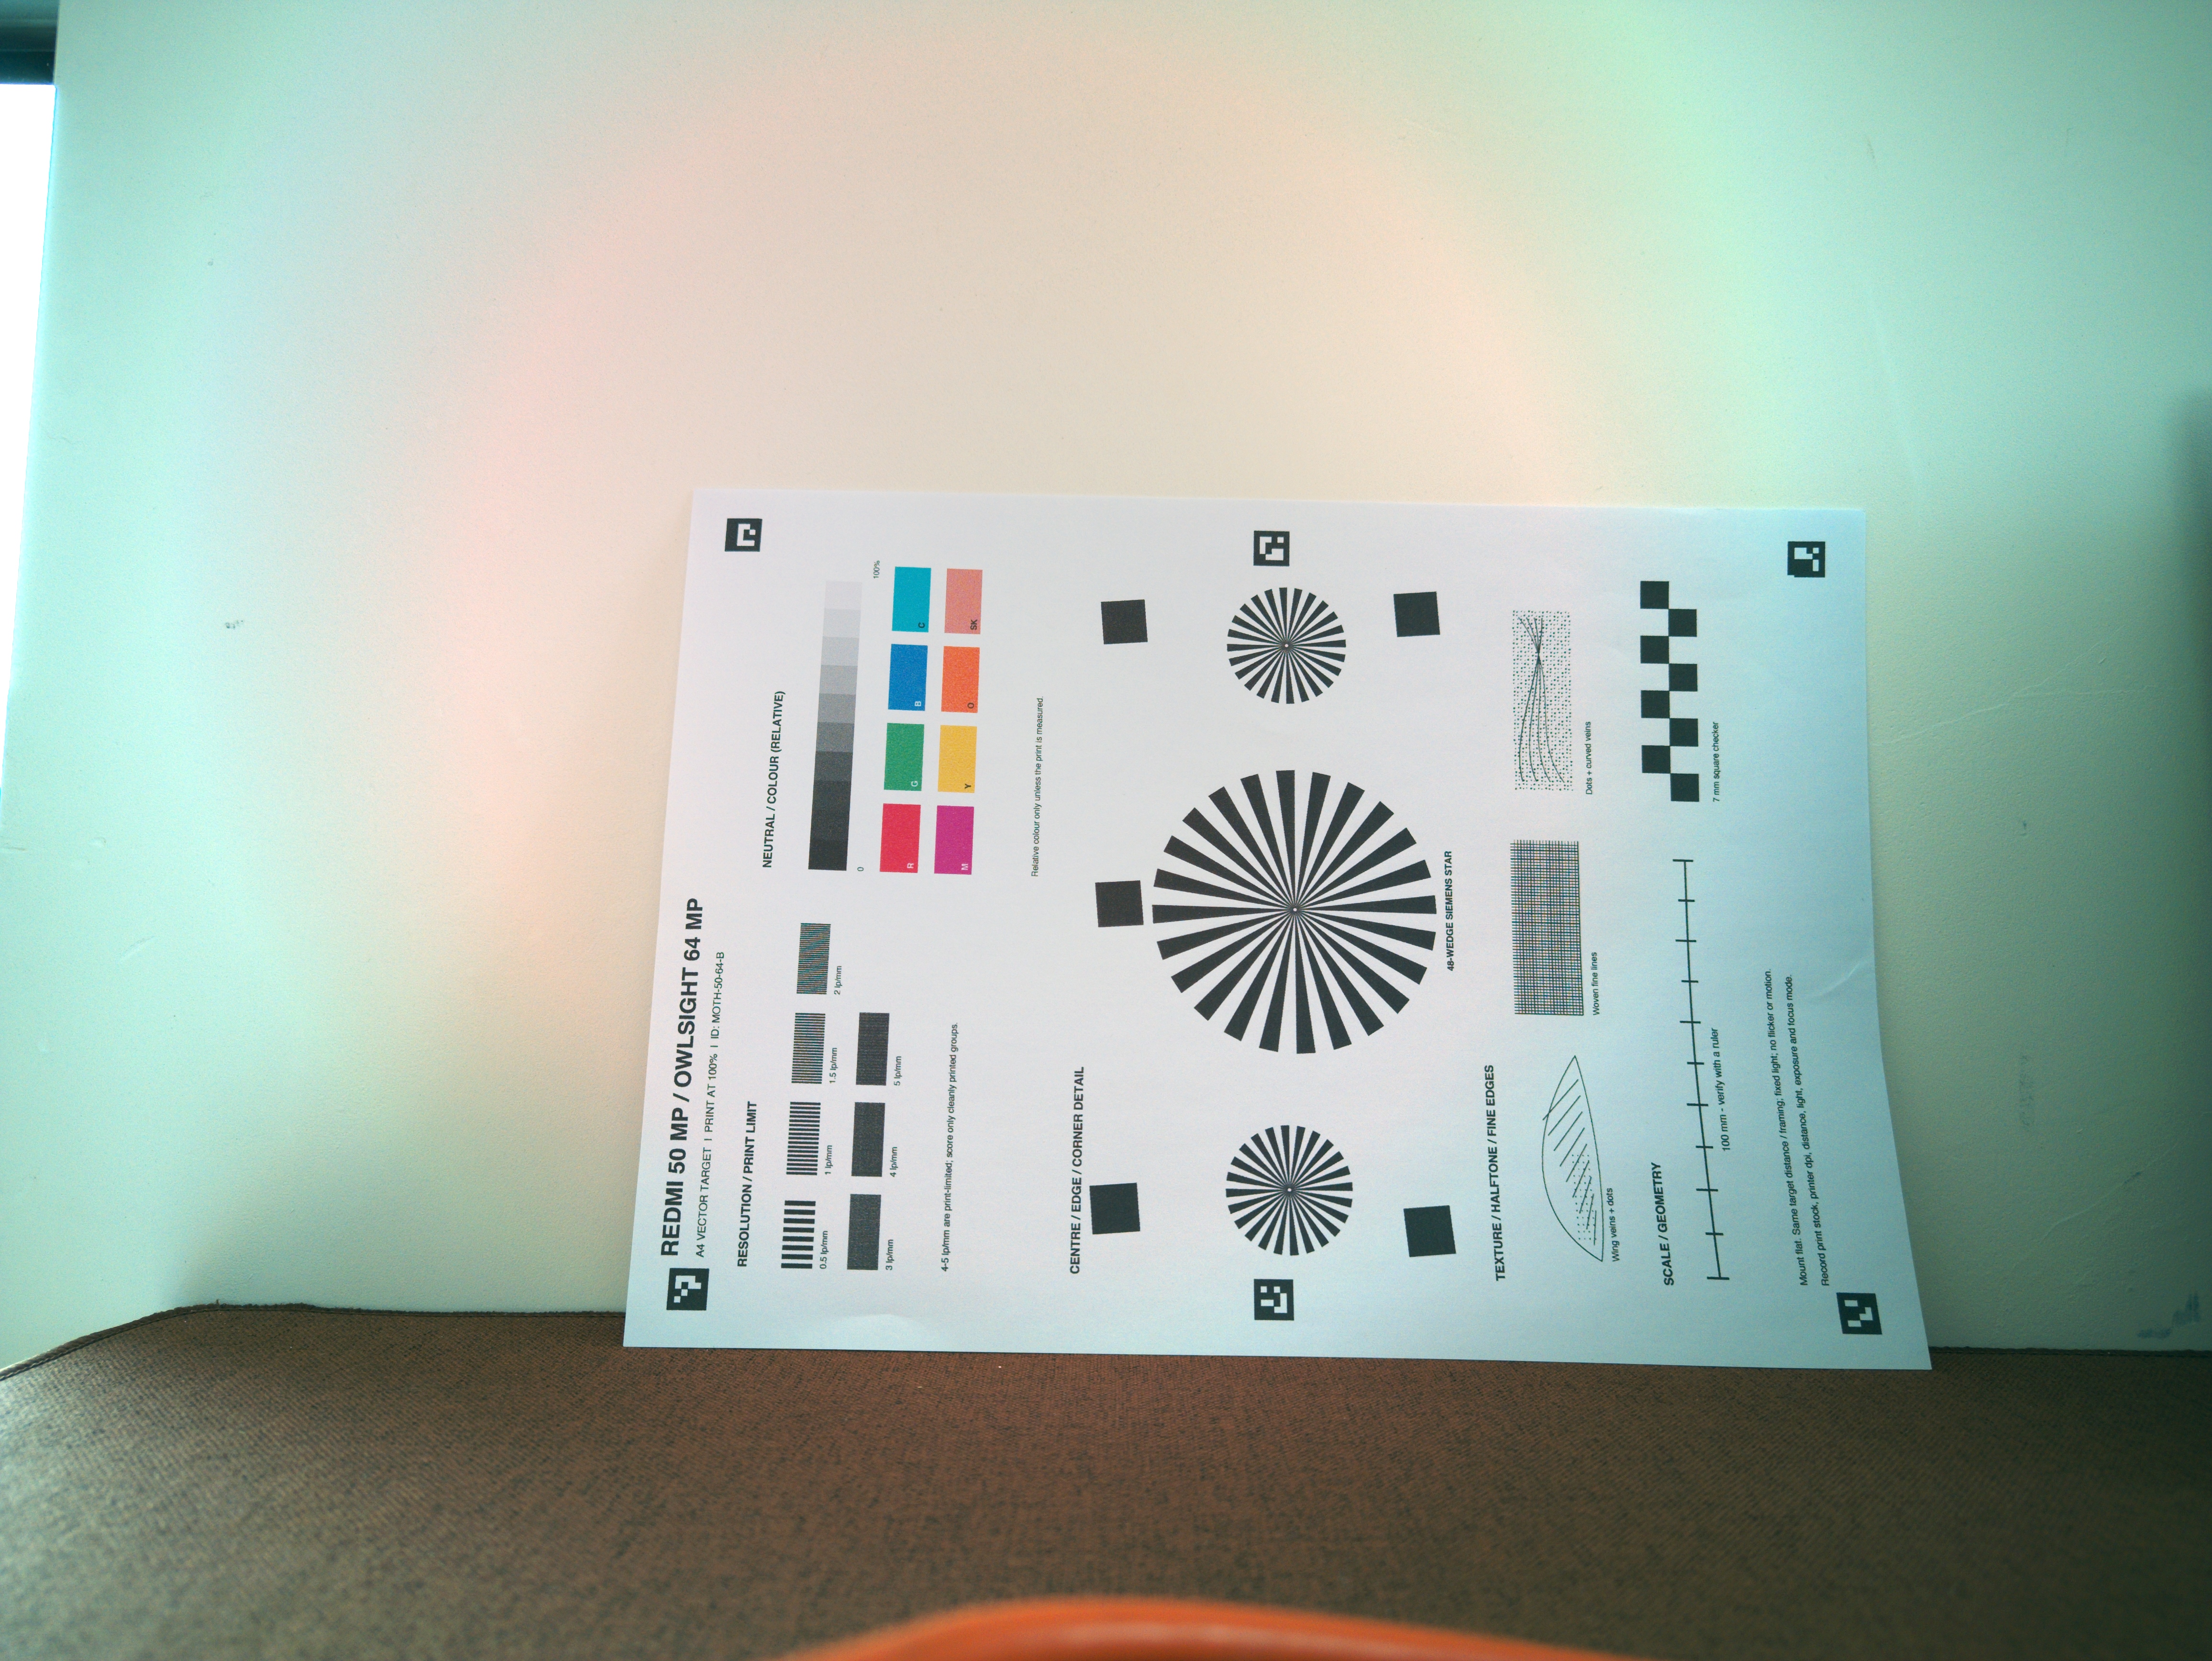
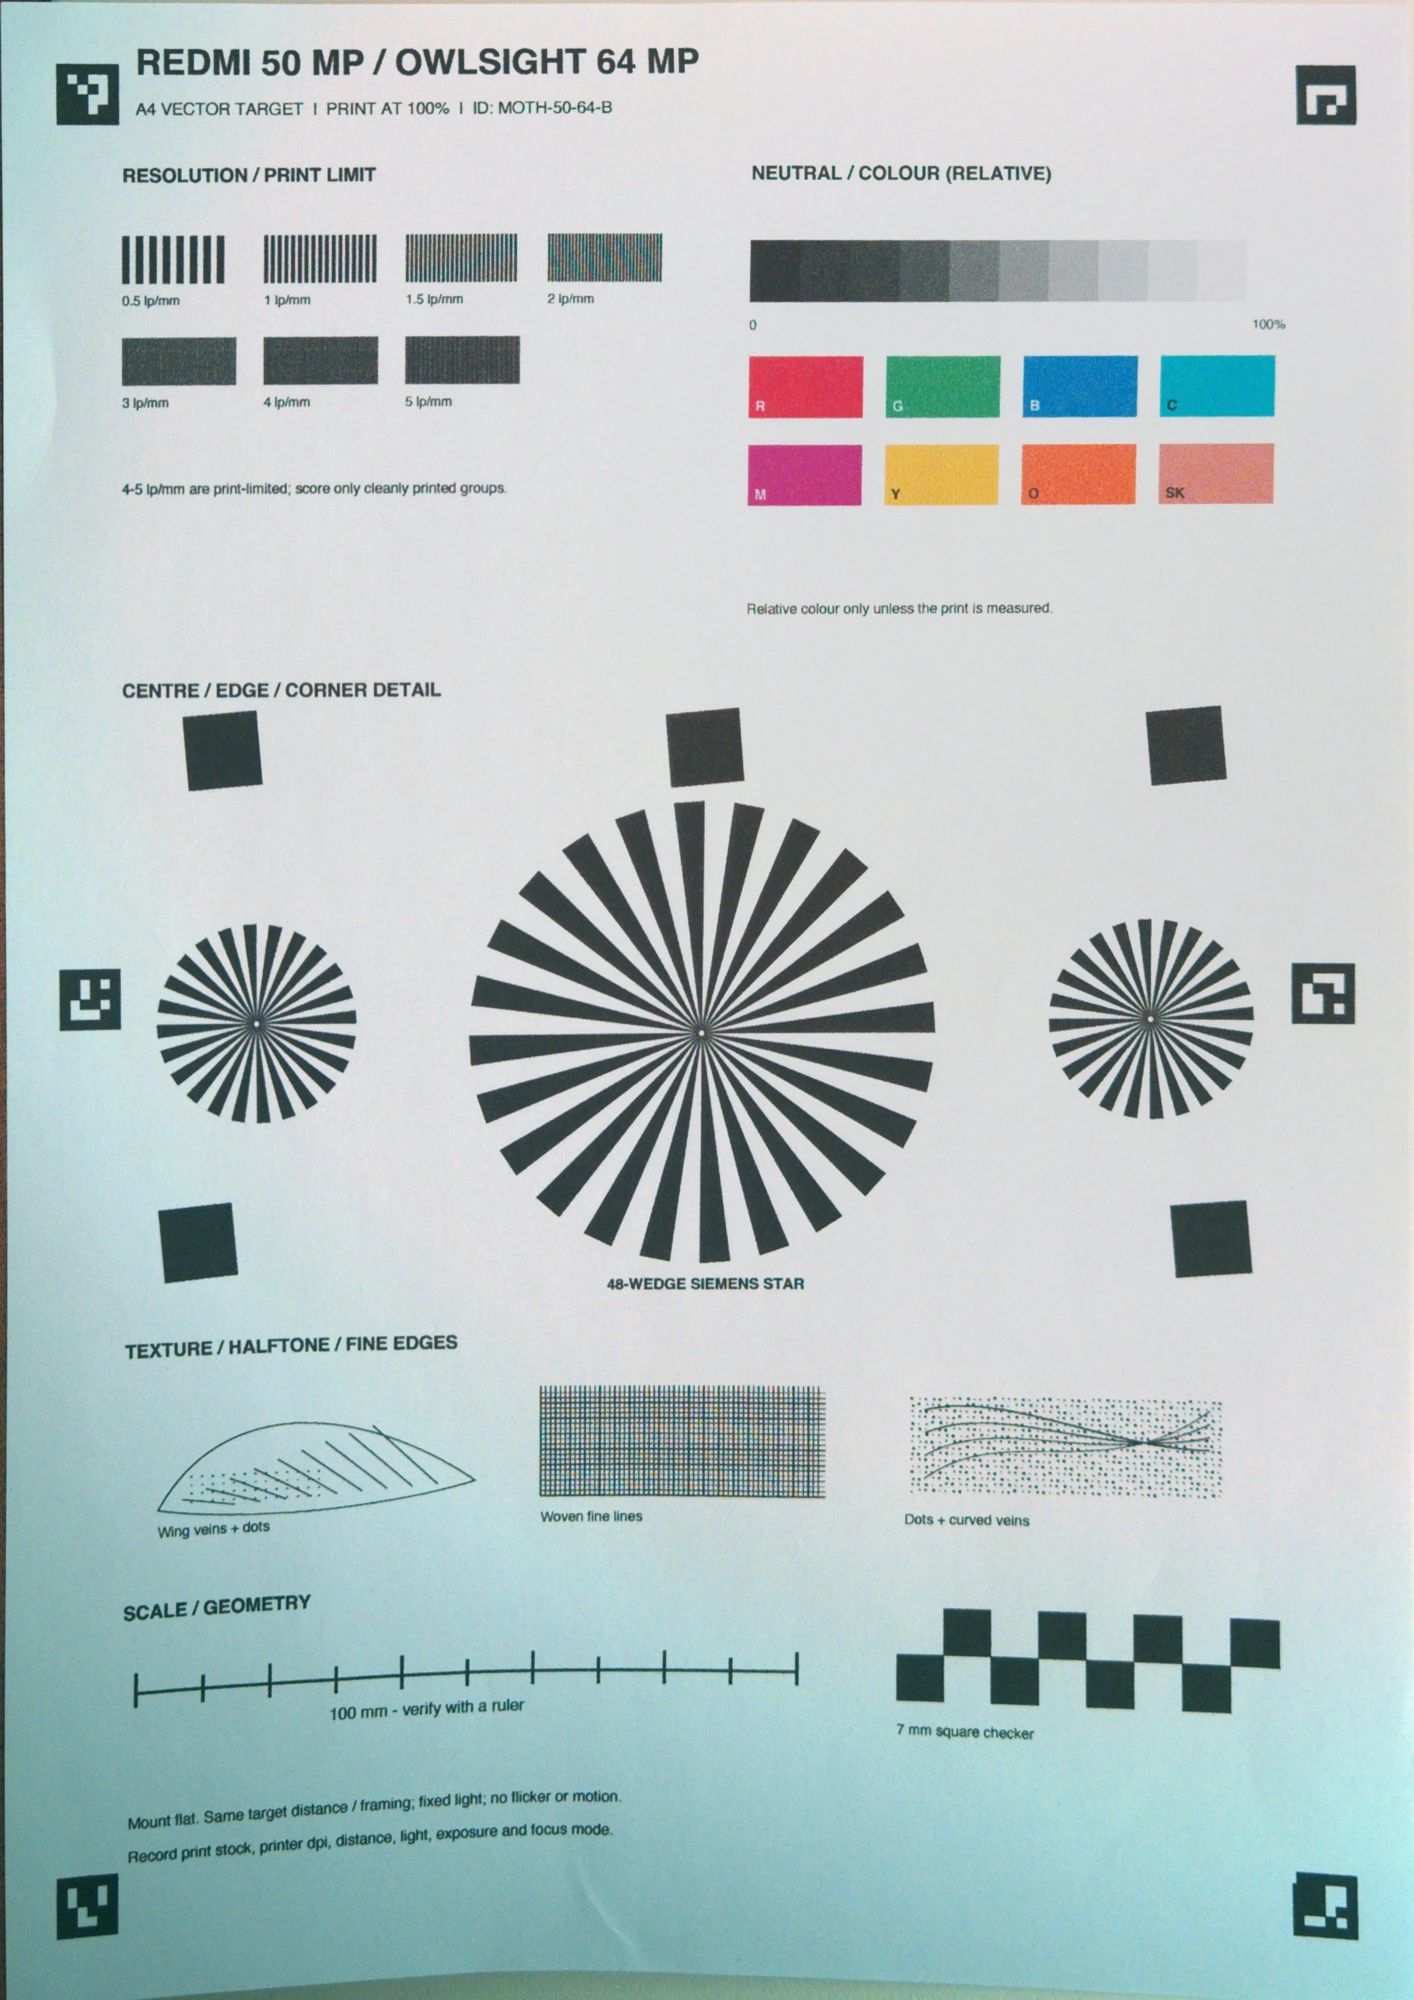
The Redmi made the strongest finished JPEG in the first test, despite having fewer pixels than the Pi. Their binned RAW files were much closer. The P4's 20.9MP native crop was less convincing, but the new full-field 16MP mode is a much more promising starting point: its RAW detail is close to the Pi's 16MP output, and the full 64MP Pi RAW showed only a modest edge-score advantage on the later pair. It also gives the P4 a wider view and more memory to spare. Xiaomi's 50MP JPEG is still my first choice for the moth rig today; the Mac experiment now shows that its JPEG can improve substantially too. The next P4 work is a reliable capture path and colour and shading calibration that carries across different scenes.